Welcome To The Shakin 'N Bakin Blog!

Welcome to my blog! I love to cook and bake for my family. I hope you enjoy the recipes, foodie reviews, foodie giveaways and cooking tips posted on my blog.

How to Print Recipes: You can print out each individual recipe featured on this blog by clicking the "share" button at the bottom of each post. It will open up to show you options, click on print and another window will open up with the recipe inside it for printing. You can also use the SHARE button to email a copy of the recipe to yourself for printing later.

Showing posts with label Cakes. Show all posts

Tuesday, August 8, 2017

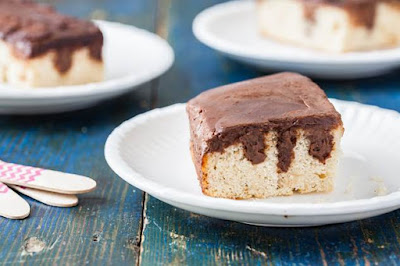
Chocolate Cardamom Poke Cake Recipe

To celebrate chocolate’s global influence on our American culture, a story of connection that brings people together, spanning time and place, AMERICAN HERITAGE® Chocolate invites you to try their Chocolate Cardamom Poke Cake Recipe.

The brand’s unique flavor profile makes it a joy to explore new ideas! Like the complexity of a fine wine, a bite of AMERICAN HERITAGE® Chocolate reveals layers of taste. That should be no surprise. The mildly spicy and slightly sweet recipe is flavoured with a blend of 11 spices and ingredients available during the 18th century that range from the heat of chili peppers, to the warmth of vanilla, to the freshness of orange peel. The following recipe will yield 12 servings.

Chocolate Cardamom Poke Cake Recipe

Chocolate Cardamom Poke Cake Recipe

For the Cardamom Cake:

3 cups all-purpose flour
1 3/4 C sugar
1 1/2 tsp. baking powder
1 Tbsp. cardamom
3/4 tsp. salt
4 large eggs
3/4 C butter, melted
1 cup whole milk
1 Tbsp. vanilla extract

For the Chocolate Pudding:

2 1/4 C whole milk, divided
1 ½ Tbsp. cornstarch
1/2 C sugar
Pinch of salt
1 egg
2 egg yolks
1 cup AHC chocolate drink mix
2 Tbsp. unsalted butter, at room temperature

For the Cardamom Cake:

1. Pre-heat oven to 350F, and grease a 9 x 12 inch glass or metal baking pan.

2. In the bowl of a standing mixer fitted with a paddle attachment, or in a large bowl, if using a hand mixer, combine the flour, sugar, baking powder, cardamom, and salt. Add the remaining ingredients, and beat on medium speed until combined, about two minutes.

3. Pour the batter into the prepared pan, and bake in the pre-heated oven for 20 to 25 minutes, until a toothpick inserted in the center comes out clean. While the cake bakes, make the chocolate pudding.

For the Chocolate Pudding:

1. In a small bowl, whisk the cornstarch with 1/4 cup of milk, until smooth. Set aside.

2. In a medium saucepan, over medium-high heat, combine the remaining milk with the sugar and salt. Whisk until the mixture reaches a boil, then pour the cornstarch mixture into the pot, whisking constantly. Allow the mixture to reach a boil, then reduce heat to medium-low and simmer, whisking constantly, until the pudding is thick enough to coat the back of a spoon, about 2 minutes.

3. In a medium bowl, whisk the whole egg with the egg yolks. Temper the eggs by gradually whisking about 1 cup of the hot pudding into the eggs until thoroughly incorporated, then scrape this mixture back into the saucepan. Cook the pudding over medium heat, whisking constantly, until it just comes to boil, about 1 minute.

4. Add the chocolate and butter and whisk until melted, and the pudding is smooth, about 1 minute. Remove from heat and set aside until the cake has finished.

5. Once the cake is baked, use the handle of a wooden spoon to poke holes over every ½ inch of the cake, poking only about half-way down the cake. Pour the still warm pudding evenly over the cake. Cover, and place in the refrigerator to set, about 2 hours, before serving. Poke cake will last, refrigerated, 4 days.

Wednesday, May 17, 2017

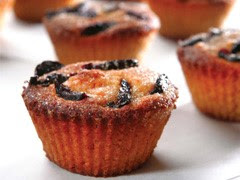
Feta and Olive Oil Cakes Recipe

Feta and Olive Oil Cakes Recipe
Looking for something just a little bit different to make? How about this recipe which is a cross between a cake and a muffin? Today's guest post recipe is courtesy of Gaea. They would be perfect for any spring or holiday brunch!

Feta and Olive Oil Cakes Recipe

5.30 ounces (or a little less than ¾ cup) feta cheese
3/4 cup powdered sugar
2 1/4 Tbsp. honey
1/2 cup Gaea's Kalamata D.O.P. Greek Extra Virgin Olive Oil
1 cup all-purpose flour
3.50 ounces (or a little less than ½ cup) ground almonds
1 tsp. baking powder
Gaea Pitted Kalamata olives, cut in half
Brown sugar for garnishing

Preheat oven to 350F. Process the cheese with the sugar and honey in a mixer until smooth. Add olive oil. Combine flour with the ground almonds and baking powder and add to bowl while mixing. Divide batter among 6 greased one-use individual cake molds and top each with half an olive. Sprinkle top of batter with brown sugar and bake for about 25 minutes.

Once done, remove and let sit for an additional 3-5 minutes before serving. They can be served warm or at room temperature.

Tuesday, May 2, 2017

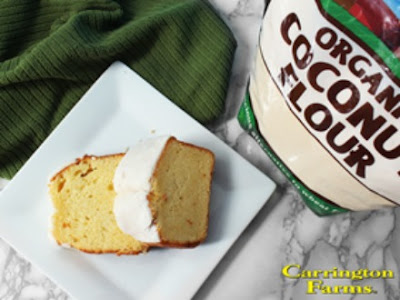
Lemon Pound Cake with Coconut Butter Glaze

Lemon Pound Cake with Coconut Butter Glaze Recipe
With spring finally here, it’s time to focus on healthy eating habits to get your body in tip-top shape for summer. However, this doesn’t mean you have to nix your favorite cakes and pound cake! Instead, swap-in coconut flour for regular flour in all your favorite recipes to enjoy baked goods, without the guilt.

Carrington Farms Organic Coconut Flour is a great-tasting, flour alternative that is low in carbs and perfect for paleo and gluten-free baking. From muffins to scones and pancakes, this flour will be the baker’s best friend this spring. The following is a guest post recipe courtesy of Carrington Farms.

Lemon Pound Cake with Coconut Butter Glaze Recipe

5 eggs
1/3 cup Carrington Farms coconut oil, melted
1/3 cup maple syrup
1/3 cup lemon juice
zest of 1 lemon
1/2 cup plus 1 T Carrington Farms coconut flour
1/4 cup tapioca starch
1/2 t baking soda
Pinch salt
1/3 cup coconut butter, for glaze
2 T maple syrup, for glaze
2 T lemon juice, for glaze

Preheat the oven to 350 degrees F and grease a 7.5” by 3.5” loaf pan. In a mixing bowl, whisk the eggs with the coconut oil, maple syrup, lemon juice, and lemon zest. Add the coconut flour, tapioca starch, baking soda, and salt. Mix well. Transfer to prepared loaf pan. Bake for 40 minutes, or until a toothpick inserted in center of cake comes out clean. Remove from pan and cool completely. In a small bowl, mix together the coconut butter, maple syrup, and lemon juice for the glaze. Spread on cake.

Thursday, February 16, 2017

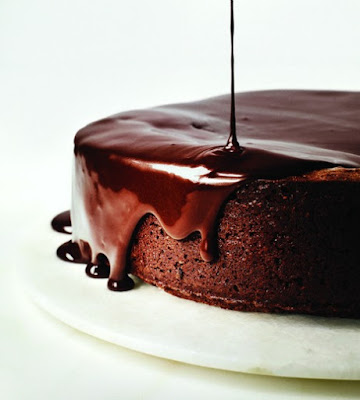
Dark Chocolate Cake with Red Wine Glaze Recipe

Dark Chocolate Cake with Red Wine Glaze Recipe
Looking for the perfect decadent dessert to make? I think this gourmet cake recipe would make the perfect dessert to serve at dinner parties, holiday meals or if you're planning a romantic dinner for two. The recipe is courtesy of Epicurious Wine. The plummy-berry notes of red wine are highlighted when mixed with chocolate and butter into a glaze that drips over the edges of this decadent dark chocolate cake. Recipe makes 10 servings.

Dark Chocolate Cake with Red Wine Glaze Recipe

Cake:

1 cup (2 sticks) unsalted butter, cut into pieces, plus more for pan
1/3 cup all-purpose flour, plus more for pan
8 ounces bittersweet chocolate (at least 70% cacao), chopped
1 cup sugar
4 large eggs
3/4 teaspoons kosher salt

Glaze and assembly:

8 ounces bittersweet chocolate (at least 70% cacao), finely chopped
1/4 cup (1/2 stick) unsalted butter, cut into small pieces
1/2 teaspoon kosher salt
1/2 cup powdered sugar
1/2 cup Epicurious Cabernet Sauvignon

Special equipment: A 9" springform pan

For cake:

Preheat oven to 325°F. Lightly butter and flour pan. Heat chocolate, sugar, and 1 cup butter in a heatproof bowl set over a saucepan of simmering water (bowl should not touch water), stirring, until chocolate is almost completely melted, about 3 minutes; remove from heat and continue to stir until chocolate is completely melted. Let cool completely.

Using an electric mixer on medium speed, add eggs to chocolate mixture 1 at a time, beating to blend after each addition. Beat until mixture has a mousse-like consistency. Reduce speed to low and add salt and 1/3 cup flour; mix until smooth. Scrape batter into prepared pan; smooth top.

Bake cake until top is firm and edges are slightly darkened, 55-65 minutes (rely on visual cues; a tester inserted into cake's center will come out clean before cake is truly done). Transfer pan to a wire rack and let cake cool completely in pan before turning out.

For glaze and assembly:

Heat chocolate, butter, and salt in a heatproof bowl set over a saucepan of simmering water (bowl should not touch water), stirring, until chocolate and butter are melted, about 5 minutes. Whisk in powdered sugar.

Meanwhile, bring wine just to a boil in a small saucepan.

Remove chocolate mixture from heat and whisk in wine; let cool until slightly thickened and a rubber spatula leaves a trail in mixture when stirring, 8-10 minutes.

Set cake on a wire rack set over a rimmed baking sheet. Pour glaze over cake and spread it across the top and over the edges with an offset spatula. Let cake stand at room temperature until glaze is set, 2-3 hours.

DO AHEAD: Cake can be made and glazed 2 days ahead. Chill. Bring to room temperature before serving.

Tuesday, January 31, 2017

Easy Vanilla Buttercream Frosting Recipe

About 15 years ago my mother taught me how to make vanilla buttercream frosting and I've been making it ever since. It's my family's favorite homemade frosting that I use to top off cupcakes, cakes, brownies and sometimes I will frost a homemade loaf of cinnamon raising bread with this particular frosting. It's super creamy and yes...sweet!

One of the reasons I love this recipe is that it only utilizes 4 different ingredients. Next, if I need a stiffer frosting, I'll add a tad more confectioners' sugar. If I need it a little less stiff and more creamy, I'll add a tad more milk. You can really play around with those two ingredients to get the perfect consistency to your own liking. Finally, I typically have all four of these ingredients on-hand, so I don't need to run out to the grocery store at last-minute!

Let's face it...homemade frosting is definitely BETTER than the store-bought counterparts! Here's my mom's recipe which will make approximately 3 cups. If you're going to frost a 2-layer cake, you'll most likely want to prepare a double batch.

Easy Vanilla Buttercream Frosting Recipe

Vanilla Buttercream Frosting Recipe

1/2 cup butter, softened (not margarine)
4-1/2 cups confectioners' sugar
1-1/2 teaspoons vanilla extract
5 to 6 tablespoons whole milk

In a large mixing bowl, beat the softened butter with an electric hand-mixer until creamy. Beat in the confectioners' sugar, vanilla extra and milk. Continue beating until it reaches the desired consistency.

Wednesday, June 29, 2016

Gaea Lemon Zest Cake Recipe

When my great auntie was alive, she loved any lemon flavored foodie item. Seriously, lemon cakes, pies, muffins, tortes, cupcakes or any other type of lemon dessert was on her favorite's list! Every time we attended a family party or other family event at her home...we could always count on a good old-fashioned lemon dessert to be on the menu.

Now that's she gone and no longer with us...I've been craving some of her favorite desserts. Just last week I received this guest post recipe and it totally reminded me of her! This recipe is courtesy of Gaea. You can visit their site to learn more about their olive oil products and to pick up additional recipes.

Gaea Lemon Zest Cake Recipe

1 ½ cups organic rye flour
¼ teaspoon sea salt
2 teaspoons gluten-free baking powder
¼ cup finely ground pine nuts
Zest of 2 lemons
1 cup organic sugar cane
3 eggs
¼ cup freshly squeezed lemon juice
1 cup Greek yogurt
2/3 cup Gaea Organic extra-virgin olive oil

Preheat oven to 375 degrees and grease the pan. In a medium bowl mix the flour, sea salt, baking powder and pine nuts. Next, mix the lemon zest into the sugar cane. In a separate bowl mix the zesty sugar cane with 3 eggs for about 2 minutes, then add the lemon juice, Greek yogurt and Gaea olive oil. Combine both bowls and pour the batter into the cake pan. Bake for 30-35 minutes.

Monday, March 7, 2016

No-Bake S'mores Ice Cream Cake Recipe

A few weeks ago we had a birthday party for a member in my family. As the hostess of the party I needed an easy-to-prepare birthday cake recipe that every person would enjoy. I headed on over to the Country Crock web site and found their S'mores Ice Cream Cake Recipe and decided to make that. Let me tell you...it was a huge hit! Since making it that first time...I've now made it three additional times and it never lasts long!

You can print the recipe directly from the Country Crock website or grab it below. Delicious!!!

No-Bake S'mores Ice Cream Cake Recipe

2 cups graham cracker crumbs
1/2 cup Country Crock® Spread, melted
1/3 cup sugar
1 package (12 oz.) semi-sweet chocolate chips
4 cups mini marshmallows, divided
1 cup 2% milk
1 cup crumbled graham crackers
1 container (1.5 qt.) Breyers® Chocolate Ice Cream
1 container (8 oz.) whipped topping

Combine graham cracker crumbs, melted Country Crock® Spread and sugar in medium bowl; press into 13 x 9-inch glass or ceramic baking dish. Microwave chocolate chips, 2 cups marshmallows and milk in small microwave-safe bowl at HIGH 4 minutes or until completely melted, stirring once. Cool 10 minutes, then stir in remaining 2 cups marshmallows. Spread over crust; freeze 1 hour or until firm.

Sprinkle crumbled graham crackers over chocolate layer. With scissors, cut carton from Breyers® Chocolate Ice Cream. Arrange Ice Cream on its side, then cut crosswise into 4 slices. Arrange slices in baking dish, pressing to form an even layer. Cover and freeze 4 hours or overnight.

Frost with whipped topping just before serving. Sprinkle, if desired, with additional graham cracker crumbs.

Disclosure: Recipe is courtesy of Country Crock. The photograph is copyright & courtesy of Shelly Hill ~ Owner of the Shakin 'N Bakin Foodie Blog.

Tuesday, December 8, 2015

Chocolate Coconut Cake Bites Recipe

The holiday season is fast approaching, and that means chocolate, eggnog and cookies galore! For many of you, a healthy diet may take a backseat to holiday feasts. In fact, the average person consumes roughly 3,000 calories on Christmas Day! The key to enjoying a healthy season starts with striking a balance between enjoying seasonal treats and making smart choices.

Stay on track with these tips from the Vitamin Shoppe Nutritionist and Digital Content Writer, Brianna Diorio.

Top Three Tips:

* Portion Control - Try using a tablespoon or fork instead of communal serving spoons to measure out individual portion sizes onto your plate for ‘indulgent’ items.

* Beverage Choices - Cut back on alcohol while enjoying your actual meal - it acts as an appetite stimulant and causes blood sugar levels to drop, often leading to mindless snacking while enjoying your actual meal?

* Stay on Track - Scout a workout buddy for the day after a holiday party to keep you committed to burning off extra calories.

* Note: You can find some of the ingredients used in the recipe below at your local Vitamin Shoppe and at VitaminShoppe.com.

Chocolate Coconut Cake Bites Recipe

1 egg, large
1/2 tsp low sodium baking powder
1/4 cup unsweetened almond milk
3 tbsp. Coconut Secret Coconut Flour
3 scoops plnt chocolate protein
1/2 cup unsweetened applesauce
1 cup (170g), Total 0% Greek Yogurt Plain (Fage)
4 Tablespoons, Now Real Foods Unsweetened, Shredded Organic Coconut

Directions: Coat pain with coconut oil. Combine ingredients (minus the coconut flakes) into the coated baking pan. Add coconut flakes on the top before placing in oven. Bake at 385 degrees for 30 minutes. Cut into 12 pieces.

Friday, December 4, 2015

Ready to Bake Liquid Baking Batters

In France, sweet treats have been an important part of holiday traditions for centuries, and this season, home cooks in America can impress their holiday guests by incorporating a new product from esteemed French dessert maker PrePat’33 into their Thanksgiving, Christmas and New Year menus.

Filled with wholesome real ingredients, READY TO BAKE LIQUID BATTERS are inspired by actual French recipes. The handy pouches keep for up to a year in your cupboard and bake in 10 - 25 minutes, depending on which delicious treat you prepare. And the best part—no additional ingredients are needed. Simply pour the READY TO BAKE batter into a cake pan or muffin tin, and bake.
Chocolate Cake
Serve up one of these gourmet treats this holiday season—we dare your guests to detect that they’re not scratch-made!

* Caramel Salted Butter Lava Cake: Based on a traditional French recipe; contains gourmet salt from Brittany.
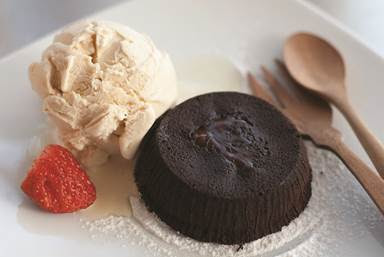
* Chocolate Lava Cake: Rich, decadent, ooey-gooey goodness.
* Chocolate Cake: Indulgent and loaded with real cocoa.
* Brownies: Bakes in about 25 minutes. A French take on an American classic.
* Gluten-free Brownies: Just because it’s gluten-free doesn’t mean it can’t be delicious!
* Blueberry Muffins: Bakes in about 25 minutes. Loaded with real blueberries.
My Thoughts: I love to bake and I primarily bake from scratch. One of the reasons I was a scratch baker was because I could never find pre-packaged baking mixes that tasted as good as homemade until now! After sampling the Ready to Bake Liquid Batters...I've completely have changed my mind!

For this review I received complimentary packages of the Blueberry Muffins, Brownies and the Chocolate Lava Cake to try out for all of you. One of the things that immediately impressed me about these baking mixes is that you need absolutely no other ingredients! The liquid batter is in a squeeze pouch and you simply open it up, put it into your prepared pan and bake according to directions. These things are fabulous for RV travelers like me because we can now bake on-the-road without having to drag along a ton of supplies and ingredients.
The first one that my family tried out was the Ready to Bake Lava Cakes. We decided to pour the batter into a muffin tin and fill the cavities about 1/2 full. We baked according to directions and once they were done...we left them cool for a few minutes and then dug-in. These are delicious when eaten warm. You can eat them all on their own or top them with some vanilla ice cream, frozen whipped topping or even a creamy yogurt spread. Delicious! These didn't last long!

A few days later we whipped up the Ready to Bake Blueberry Muffin Mix. One of the things that really impressed me with this one was the size of the blueberries! One of the reasons I always stayed clear of pre-packaged muffin mixes was because the fruit was always super miniature in size. Well, not with Ready to Bake muffin mixes! These blueberry muffins were moist and flavorful. Just be prepared though...this is a very thick and gooey batter. I had to spoon it into my muffin cups...but other than that, it's fabulous!
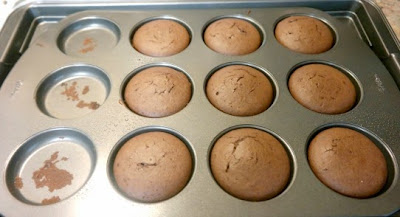
If chocolate lave cakes are a tad too sweet for you but yet...you love chocolate, I highly recommend you try out the Ready to Bake Brownies! You can make them in a brownie pan or a muffin pan. (I like using muffin pans and filling the cavities 1/2 way when I make brownies b/c it makes the perfect sized portions. These chocolate brownies have a moist cake-like texture to them. They're not a "wet" brownie and I really enjoyed these!

I can honestly tell you that my entire family enjoyed all three of these Ready to Bake Liquid Batter Baking Mixes! I am going to look for this brand in stores near me and pick up several of them to have on hand. Plus...when we get the RV out again next summer...you bet, I'll be taking these baking mixes on the road with me. Absolutely fantastic!

The READY TO BAKE LIQUID BATTER products are currently available at: Central Market stores in Texas, WINN DIXIE stores in Florida, Louisiana and South Carolina, Meijer stores in Wisconsin, Michigan, Ohio, Kentucky, Indiana and Illinois and you can find them in Fairway stores in New York, New Jersey, and Connecticut. The products are also available for online order anytime through igourmet.com.

Disclosure: Shelly received complimentary samples of the products featured in this foodie review. No monetary compensation was received. Regardless of receiving free products, Shelly is sharing her 100% honest and unbiased opinion with her readers. Your opinion may differ.

Saturday, November 14, 2015

Dairy-Free Walnut Cake Recipe

The Kontos family, owners of Kontos Foods, a New Jersey-based provider of traditional Mediterranean foods, would like to share this favorite, dairy-free, recipe. This moist walnut cake is flavored with cinnamon, cloves and orange juice; topped with powdered sugar. It makes a delicious treat during Lent, or anytime!


Greek Easter Lenten Walnut Cake Recipe

4 cups flour
2 cups sugar
1-1/2 cups water
1-1/2 cups vegetable oil
1 cup chopped walnuts
1 tbsp. baking soda
1 tbsp. baking powder
½ tsp. ground cloves
½ tsp. cinnamon
Juice from one orange - strained
Powdered sugar, for topping

Preheat oven to 375⁰ Fahrenheit. Blend flour, baking powder, ground cloves & cinnamon in a bowl. Add vegetable oil to flour mix and blend. Add sugar, water, baking soda, and juice to mix. Blend walnuts into batter. Grease 9” x 12” baking pan and pour in batter. Bake for approximately 1 hour, or until toothpick comes out clean. Let cool, sprinkle powdered sugar on top and cut into squares.

“This easy-to-make recipe has been in our family for generations. With fresh squeezed orange juice, fragrant spices and a sprinkling of powdered sugar, it’s festive for the holidays and also great for special meals or coffee get-togethers,” said Steve Kontos, Vice President of Kontos Foods.

Kontos sells its products to retailers and foodservice establishments across North America and around the world. Find Kontos Foods on Twitter @KontosFoods, on Facebook and on Pinterest.

To Print: Click on the SHARE button located at the bottom of this post. A new window will open. Click on PRINT and the recipe will load into the window for quick printing.

Monday, October 19, 2015

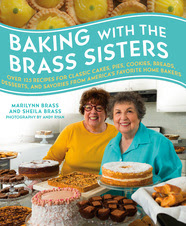
Cookbook Review: Baking with the Brass Sisters

Over the past 24+ years I've amassed a large cookbook collection. I love to cook but my main passion is baking...so the majority of the 300+ cook books that I own are within that niche. I was pretty excited to get a complimentary copy of the new "Baking with the Brass Sisters" to review for all of you.

Title: Baking with the Brass Sisters
Authors: Marilynn Brass and Sheila Brass
Publisher: St. Martin’s Press
ISBN: 978-1-250-06435-6

The "Baking with the Brass Sisters" is a hardcover cookbook with over 125 recipes for classic cakes, pies, cookies, breads, desserts and savories from America's favorite home bakers. At the beginning of the book is an entire section of baking terms explained, baking tips, food styling tips, etc. I really learned a lot by just reading that section of their book.

The cookbook is broken down nicely into 10 different chapters:

* Rise and Shine
* A Piece of Cake
* The Cookie Exchange
* Filling the Bread Basket
* Easy as Pie
* We Gather Together
* Teatimes and Coffee Hours
* Summertime Treats
* Make Mine Chocolate
* Something Savory

Within the pages of the cookbook you will find easy-to-make and delicious recipes like:

* Cheddar Poppy Seed Biscotti
* Chocolate Bread Pudding
* Lemon Chess Pie
* Lemon Drizzle Tea Cake
* Brown Sugar Brownies
* Buttery Maple Walnut Pie
* Salt & Pepper Potato Bread
* Polka Dot Chocolate Bars
* Almond Chiffon Cake
* Breakfast Corn Cake
* Irish Soda Bread
* Buckwheat Pancakes
* Orange Sponge Cake
* Plus many more!

One of the things I love about the "Baking with the Brass Sisters" cookbook is that all of the recipes are really easy-to-prepare and utilize commonly found ingredients. I don't have to make any trips to a specialty kitchen stop or gourmet grocer to pick up ingredients or supplies. It's a cook book for the everyday baker who wants delicious recipes to serve to their family or party guests. It's not lavish baking and I really appreciate that!

I'm really impressed with this cookbook and it's the first one that I own by these two authors. The foodie photography is amazing and gives you ideas on how to present & serve your newly created item. I give this cookbook a 9 out of 10 spoons on my rating scale. It's fantastic!

Disclosure: Shelly H. received a complimentary copy of this cookbook for review. No monetary compensation was received. Shelly's thoughts, opinions and words are 100% her own, unbiased opinion about the product.

Saturday, August 22, 2015

Lollapalooza-Inspired Recipes from Country Crock

With Lollapalooza closely approaching, we thought it only appropriate to share easy summer recipes - inspired by festival headliners - which you can whip up as you jam out to your favorite bands in preparation for one of this summer’s hottest music festivals (even if they can’t make it to Chicago this year).

Dancing works up a sweat. Kick-start your day with meals that give you energy to last from dawn ‘til dusk. Let's get the party started with the recipes below.

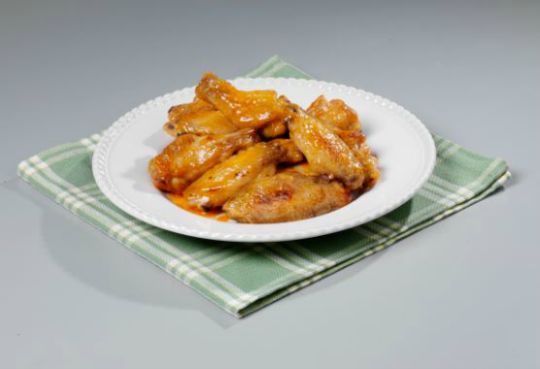
Spicy Honey Roasted Wings
* Shut up and Dip (Spicy Honey Roasted Wings)- A remix of “Shut up and Dance” by Walk the Moon - Forget all your worries with these tasty wings - perfect for dipping- and so good they’ll leave you speechless.

* Sauté with Me (Charred Corn & Zucchini Sauté) - A remix of “Stay with me” by Sam Smith - A helping of this and no one will be leaving anytime soon.

* Sugar Sugar (Country Crock Sugar Cookies) - A remix of “Shiver Shiver” by Walk the Moon - So tasty, it’ll give you the shivers.
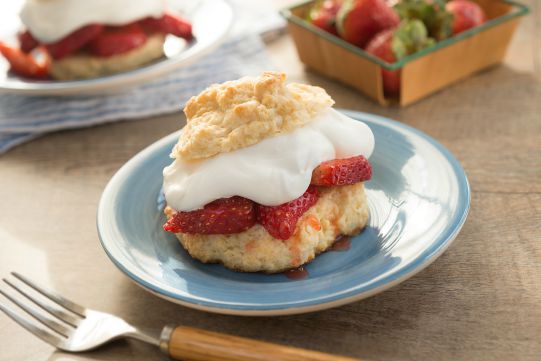
Country Crock Shortcake Recipe
* Bake It Out (Old-Fashioned Berry Shortcakes) - A remix of “Shake It Out” by Florence and the Machine - These shortcakes will leave you with no regrets.

* Live and let Pie (Country Whoopie Pies) - A remix of “Live and Let Die” by Paul McCartney - Pie that will change your outlook on life.

All of these recipes are made with Country Crock®, which adds a country fresh taste to family recipes and is made with real, simple ingredients including delicious oils, purified water and a pinch of salt. Country Crock is the go-to ingredient in the kitchen whether baking, cooking, spreading, sautéing or topping.

I got really inspired after checking out all of the Country Crock recipes and decided to whip up a batch of Country Whoopie Pies and a batch of Pumpkin Whoopie Pies. You can follow the country crock recipe above to make the chocolate whoopie pies which are moist and delicious! My family loves things like this! Once they have completely cooled store them in an airtight container. During the school year I make them several times and wrap them in plastic wrap and tuck one inside lunch boxes as a little bit of a special treat. They are always a big hit!

You can find all of the recipes featured above on the Country Crock web site along with many others! Stay tuned...I will be featuring several more recipes over the next few weeks!

Disclosure: I received FREE coupons from Country Crock for sharing these recipes with the readers of my Shakin 'N Bakin Foodie Blog. No monetary compensation was received.

Thursday, August 6, 2015

French Roast Chocolate Pudding Cakes Recipe

Nothing says back-to-school like a good cup of coffee… Currently the largest family-owned and operated coffee company in the U.S., Community Coffee Company offers high-quality blends featuring 100% select Arabica coffee beans in a variety of yummy flavors. Available in premium ground & whole bean, as well as single-serve k-cups, this coffee is not just great for sipping - it’s an amazing ingredient to cook with! Check out this recipe for French Roast Chocolate Pudding Cakes.

French Roast Chocolate Pudding Cakes Recipe

2 ½ cups all-purpose flour
1 ¼ cups cocoa, unsweetened, Dutch process
3 tsps baking powder
1 tsp Kosher salt
1 cup sugar
1 ¼ cups dark brown sugar, tightly packed and separated
1 ¼ cups Community coffee French Roast or Dark Roast, brewed
1 ½ cups whole milk
3 large eggs
1 ½ sticks butter, melted and slightly cooled
1 ½ tbsps vanilla extract
Optional: vanilla ice cream as side garnish

Preheat oven to 350 degrees. Place paper muffin cups in two 12-cup muffin pans. In a medium bowl, combine flour, 1 cup of cocoa, baking powder and salt. Whisk to remove lumps. In a separate bowl, combine sugar, 1 cup of brown sugar, brewed coffee (cooled), milk, eggs, butter and vanilla extract. Mix until smooth (some lumps will remain).
Combine the wet and dry mixtures, mixing well.

Transfer batter to the cupcake pans, filling them ¾ full. In a small bowl, mix ¼ cup of cocoa and ¼ cup of brown sugar together. Sprinkle a tablespoon over each cake and place pans in the oven to bake them for 20 minutes. The cake’s edges should be crisp, but the middle should be very soft - similar to pudding. Cool for 5 minutes before serving. Serve with vanilla ice cream as a side garnish.

Sweepstakes: Now through September 2015, Community is hosting an instant-win sweepstakes in which specially-marked 12 oz. Premium ground coffee and 12 ct. K-Cup® boxes will feature an on-pack game code that can be entered online for a chance to win prizes. You could win a flat screen TV, outdoor grill, home theater system, Keurig® brewer, or of course, lots of coffee!

Friday, July 31, 2015

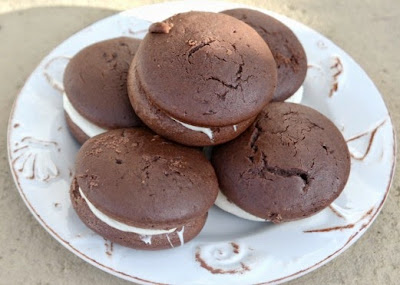
Chocolate Whoopie Pies Recipe

Pennsylvania is known for Whoopie Pies and many say that it's the Whoopie Pie birthplace. If you visit Lancaster County you will find delicious Whoopie Pies being sold in many of the Amish Country gift shops, stores, restaurants, etc.

We used to live down in Lancaster in the late 1980's and one of my neighbors gave me her chocolate whoopie pies recipe. Today...I am sharing that recipe with all of you.

Whoopie Pies Recipe

1/2 cup butter, softened
1 cup brown sugar, firmly packed
1 large egg
1 tsp. vanilla extract
2 cups all-purpose flour
1/2 cup cocoa powder
1 tsp. baking powder
1 tsp. baking soda
1/2 tsp. salt
1 cup buttermilk
whoopie pie filling (recipe below)

Preheat oven to 350 degrees F. Light spray a whoopie pie baking pan with non-stick cooking spray. Set aside.

In a large mixing bowl beat together the softened butter with the brown sugar until creamy.  Add in the egg and vanilla extract. Beat again until smooth. Set aside.

In another large mixing bowl sift together the all-purpose flour, cocoa powder, baking powder, baking soda and salt. Beat half of the dry ingredients into the first bowl until combined. Pour the remaining dry ingredients and the buttermilk into the first bowl and beat with an electric mixer until well combined.

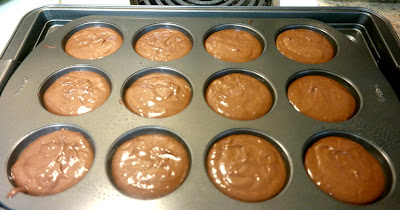
Fill each cavity of the Whoopie Pie baking pan 2/3 of the way full. Use a spoon to level off the batter in each cavity. Place baking pan into the oven and bake for 8-10 minutes or until they are done. Remove and let them completely cool before adding the filling.

Whoopie Pie Filling Recipe

6 Tbsp. butter, softened
1 1/2 cups. confectioner's sugar (10X sugar)
1/8 tsp. salt
7 oz. marshmallow creme
1 tsp. vanilla extract

In a large mixing bowl beat the butter until creamy. Add in the confectioner's sugar and salt, beat again. Beat in the marshmallow creme and vanilla extract. Keep beating the mixture until it gets more firm and thicker. It should be light, fluffy and spreadable. If needed, you can refrigerate it for an hour or two to get it to thicken up.

Spread the filling in between two of the cake halves. We add about 1 1/2 tablespoons of filling per whoopie pie. Once you have them filled and assembled, store them in an airtight container.

Tuesday, June 30, 2015

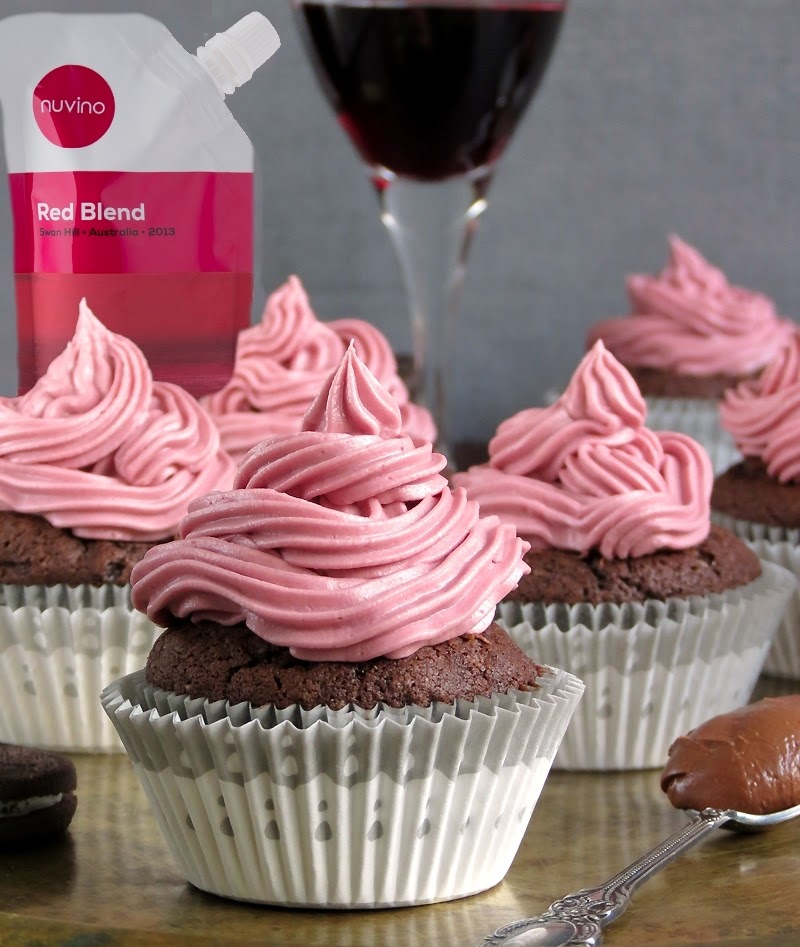
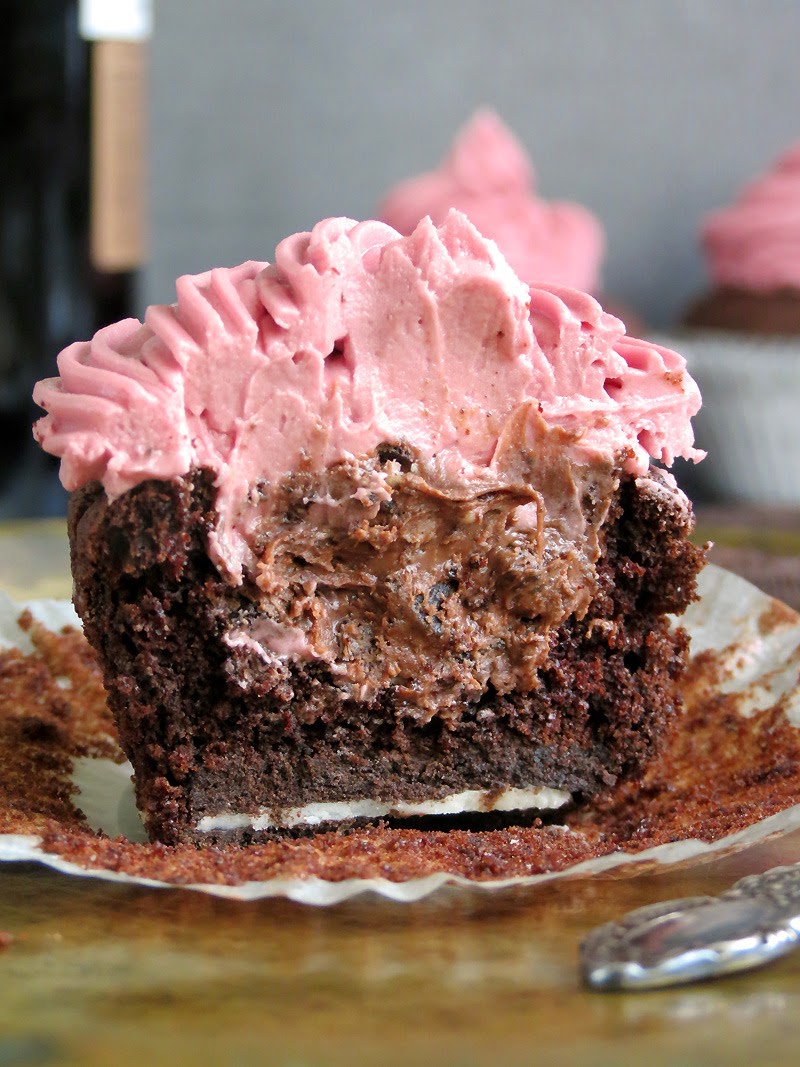
Oreo Nuvino Wine Nutella Cupcakes Recipe

What is better in life than Wine and Chocolate? Oreo's, Wine, and Nutella all combined into a Cupcake, that's what! Check out Nuvino Wine's newest recipe:

Oreo Nuvino Wine Nutella Cupcakes Recipe

For the cupcakes:
1 cup all-purpose flour
¼ cup cocoa powder
1 teaspoon baking soda
½ teaspoon baking powder
¼ teaspoon salt
¼ teaspoon ground cinnamon
¼ cup unsalted butter, at room temperature
¼ cup brown sugar
2 tablespoons granulated sugar
1 egg
¼ cup Nuvino's Red Blend Wine
½ teaspoon vanilla extract
¼ cup Nutella
10 Oreos
For the filling:
½ cup Nutella
5 Oreos
For the frosting:
1 cup red wine, any kind you like
¼ cup granulated sugar
½ cup unsalted butter, at room temperature
2 cups powdered sugar
1 teaspoon vanilla extract
salt, to taste

Preheat oven to 350 degrees F. Line 10 muffin cups with cupcake liners. Set aside. The cupcakes: In a medium bowl, sift together the flour, cocoa powder, baking soda, baking powder, salt, and cinnamon. In a large bowl, cream the butter and sugars together until fluffy. Add the egg and beat to combine. Scrape down the sides of the bowl as needed. Beat in the vanilla extract. Stir in Nutella and Nuvino's Red Blend until evenly combined. Slowly add the flour mixture to the wet ingredients and mix until just combined. Place an Oreo cookie on the bottom of each cupcake liner. Pour batter over each Oreo cookie and fill each cupcake liner about ¾ of the way full. Bake the cupcakes for about 20 minutes or until a toothpick inserted in the center comes out clean. Remove from oven and place on a wire rack to cool completely.

The filling: In a ziplock bag, place the Oreos and use a mallet to crush the cookies into small pieces. In a small bowl, combine Nutella with crushed Oreos. Set aside. The frosting: In a small saucepan, combine Nuvino's Red Blend and sugar. Cook over medium heat, stirring, until sugar dissolves and wine comes to a boil. Reduce heat and simmer for 20 minutes (until the liquid is reduced to about ¼ cup or a light syrup texture). Let to cool.

Beat the butter until until smooth and creamy. Slowly add in powdered sugar (1/2 cup at a time), vanilla, and ¼ cup of prepared wine syrup. Beat until no lumps remain. Taste the frosting and add salt to cut the sweetness, if you prefer. Assembling the cupcakes: Cut out the center of each cupcake with a sharp knife. Fill the cupcakes with Nutella & Oreo filling. Transfer the frosting to a piping bag fitted with a decorative tip. Pipe frosting into a swirl on each cupcake.

Nuvino is a single-serve, premium wine in a pouch designed to meet a growing consumer interest in international varietals available in smart, convenient packaging. Nuvino comes in four distinct wines such as Chardonnay, Malbec, Red Blend, and Sauvignon Blanc and they’re as agile, adventurous, and as adaptable as you are. In fact, not only can Nuvino go wherever your curious heart will take you, it will make new environments even more memorable as you savor both the journey and the destination. PreservPak is the technology that enables our wine to handle any adventure you throw at it by locking in and preserving all of our four distinct wines for up to 18 months while imparting no flavor profile of its own.

Wednesday, June 24, 2015

Mom's Apple Butter Cake Recipe

Today I am sharing with all of you another vintage recipe from my great aunt's stash. She has 5 huge boxes of recipes that she clipped out of magazines, newspapers and cookbooks over the years and I am preserving a lot of those vintage recipes by placing them here onto my foodie blog for others to enjoy.

Mom's Apple Butter Cake Recipe

1/2 cup vegetable shortening
1 cup granulated sugar
4 large eggs, well beaten
2 1/2 cups flour
1 1/2 teaspoons baking soda
1/2 teaspoon salt
1 teaspoon ground cinnamon
1/2 teaspoon ground cloves
1/2 teaspoon ground nutmeg
1 cup sour milk or buttermilk
1 cup apple butter

Cream the vegetable shortening, add the granulated sugar gradually and continue to cream thoroughly until fluffy. Add well beaten eggs and mix thoroughly. Sift the flour, measure and sift again with salt, baking soda and spices. Add this to the dry ingredients alternately with the sour milk (or buttermilk). Stir in the apple butter and blend it well into the mixture.

Preheat oven to 350 degrees F. Pour batter into a 5" by 9" by 4" baking dish. Bake in a preheated oven for 35 to 40 minutes or until done. Remove and let cool for 15 minutes before serving.

Note: You can print out this recipe by clicking on the "share" button located at the bottom of this post. Once you click on the button, find the PRINT button and the recipe will load into a new window for printing.

Monday, June 8, 2015

Dare to Bake! Cupcake Recipes to Awaken Your Sweet Tooth

I love to cook but I admit...I am more passionate about baking. When it comes to baking, I like to bake all kinds of things like cookies, cupcakes, fruit pies, vegetable pies and sweet breads. If I had to choose a favorite...it would be cupcakes and cookies because they are so versatile and you can find a gazillion different recipes for both.

Recently I had the opportunity to review the follow book for all of you.

Title: Dare to Bake!
Author: Ady Abreu
ISBN: 978-0-7643-4796-2

Book Synopsis: Learn to bake new and creative cupcakes using everything from the standard vanilla and chocolate to fruits and vegetables. These proven cupcake recipes can be easily recreated at home and also provide a fresh twist to some classics. There are the Tamarind and Guava cupcakes or the Hibiscus flower and Passion Fruit cupcakes that include exotic but easy-to-find fruits. There’s also a selection of all-time favorites: peanut butter apple, fruity cereal, and pumpkin spice latte. The versatility of vegetables can be found in sweet and savory cupcake flavors such as spinach, corn, and pepper. With step-by-step baking instructions for the cupcake, filling, and icing, you’ll soon be creating gourmet and delicious cupcakes that are sure to impress family and friends. This book is perfect for the avid bakers who want to look beyond the typical cupcake recipe.

My Thoughts: I collect cookbooks and have over 200+ in my current collection and I have to admit, this one is quickly becoming a favorite. It's a hardcover book with 88 pages. The foodie photography inside this book is simply mouth-watering!!! This cookbook goes way beyond the basic chocolate, white or yellow cupcake...yup, way beyond! These are gourmet cupcakes that you can easily make at home!

Examples of Recipes: Pomegranate Ginger Cupcakes, Spiced Chocolate Cupcakes, Pear & Cranberry Cupcakes, Coconut Curry Cupcakes, Fruit Cereal Cupcakes, French Toast Cupcakes, Ham & Pineapple Cupcakes, Three Peppers Cupcakes and so much more!!!

I am a banana and chocolate lover and when I saw that there was a recipe for Banana Chocolate Cupcakes I immediately did the happy dance! The recipe was inspired by frozen chocolate bananas. The base is a chocolate cupcake with caramelized banana filling and topped off with a caramelized banana icing. The author includes all three of the recipes so you can whip them up to perfection! All of the ingredients used are basic ingredients and the step-by-step instructions are super easy to follow & understand. There is a full color photograph with the recipe so that you know what they will look like when completed. We have a family reunion we will be attending later this month and I am going to make these cupcakes for sure!!!

This is a beautiful cookbook and I am so excited that I now have a copy of it in my collection. I know I will be using this book over and over again! You can find it and many other books at Schiffer Publishing. I highly recommend this one to all of you!!!

Disclaimer: Shelly H. has personally reviewed the product listed above. Shelly has not received any monetary compensation for her review. Shelly did receive a free product to try out so she could evaluate and use it for her review. Her thoughts & opinions in this review are unbiased & honest and your opinions may differ. Content on this blog is copyrighted, all rights reserved. We reserve the right to legally pursue anyone who violates our rights and/or steals our copyrighted material.

Tuesday, December 23, 2014

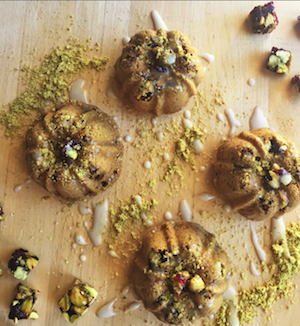
Mini Pistachio Chewy Bite Rum Bundt Cakes Recipe

Still trying to decide what to serve for dessert at your family holiday gathering? Heather Goldberg and Jenny Engel of Spork Foods have created a delicious recipe, perfect for enjoying with friends and family over the holidays. Utilizing Pistachio Chewy Bites, the sister chefs have created individually sized rum cakes that are sure to wow your crowd.


Mini Pistachio Chewy Bite Rum Bundt Cakes
Yields 12 personal bundt cakes

3/4 cup un-sweetened almond milk plus 1 teaspoon apple cider vinegar
1 3/4 cups organic un-bleached all purpose flour
1/2 teaspoon ground cinnamon
1/4 teaspoon ground allspice
1 1/2 teaspoons baking powder
1/4 teaspoon sea salt
1/2 cup evaporated cane sugar
1 tablespoon organic black strap molasses
1 teaspoon freshly grated ginger
1 teaspoon vanilla extract
1/4 cup rum
1/4 cup neutral tasting oil (Safflower)
1/3 cup finely ground pistachios
3 Setton Farms Pistachio Chewy Bites
1/2 cup organic powdered sugar
2 teaspoons un-sweetened almond milk

Directions: Preheat oven to 350°.

In a measuring cup, add almond and apple cider vinegar and set aside to curdle, about 1-2 minutes.

To a large mixing bowl, add flour, cinnamon, allspice, baking powder, sea salt and sugar and whisk until uniform. Add molasses, ginger, vanilla extract, rum, oil and curdled almond milk mixture. Whisk until smooth and uniform.

Grease mini bundt pan with cooking spray and sprinkle ground pistachios into each section. Tap to shake and evenly disperse pistachios in each section coating lining of each mini bundt cake.

Dice Setton Farms Pistachio Chewy Bites into small pieces and place a few in each bundt cake section. Pour about 1/3 cup batter into each bundt cake. Place in oven.

Meanwhile, whisk powdered sugar and almond milk until smooth, for icing.

Bake for 23-25 minutes or until toothpick comes out clean. Cool completely and drizzle each cake with icing.

About the chefs: L.A.-based sisters and celebrity chefs, Heather Goldberg and Jenny Engel of Spork Foods are vegan chefs that own a Los Angeles-based gourmet cooking school. The culinary duo are also cookbook authors and work with some of Hollywood’s elite including Emily and Zooey Deschanel, Kristen Bell and Dax Shepard, Kristin Bauer van Straten and Alicia Silverstone.

About Pistachio Chewy Bites: With two main ingredients, Pistachio Chewy Bites provide healthy snack lovers the amazing benefits of pistachios and cranberries in a delicious and nutritious bite-size bar. Pistachio Chewy Bites are heart-healthy, 100% all natural, gluten and dairy free, low in sodium, GMO free, vegan and a great on-the-go protein snack. They also have no cholesterol, zero trans-fat and are a good source of dietary fiber. These nutrient-rich snack bars provide a great balance of carbohydrates, protein and fat for sustainable energy. With 7 grams of protein, 3 grams of fiber and healthy fat, the individually wrapped bars are the perfect one stop shop.
Pricing: 6-Pack $5.99 and 16-Pack $12.50
Website: http://www.pistachiochewybites.com

Tuesday, October 28, 2014

Homemade Pumpkin Whoopie Pies Recipe

Here is my aunt's famous recipe to make homemade Pumpkin Whoopie Pies. She makes them every Fall season for the family to enjoy and we all rave and rave about them. Finally, I decided to try to make them myself and they turned out delicious!

Pumpkin Whoopie Pies Recipe

3 cups pumpkin puree
3 cups granulate sugar
1 1/2 cups vegetable shortening
3 large eggs
5 1/2 cups all purpose flour
3 tsp. baking powder
3 tsp. ground cinnamon
3 tsp. vanilla extract
3 tsp. baking soda
1 tsp. salt

Cream the pumpkin puree, granulated sugar, vegetable shortening and the large eggs together in a large bowl. Gradually add dry ingredients. Drop them from a tablespoon onto a greased cookie sheet. Bake at 350 degrees for 12-15 minutes.

Vanilla Filling Recipe:

2 egg whites, beaten
1 tsp. vanilla extract
2 cups confectioners sugar
1 1/2 cups vegetable shortening

In a medium sized bowl beat egg whites, vanilla extract, confectioners sugar well. Then add in the vegetable shortening and beat again until smooth. Spread filling between two baked pumpkin cookie halves.

Store the Whoopie Pies in an airtight container or wrap each one in plastic wrap.

Saturday, October 11, 2014

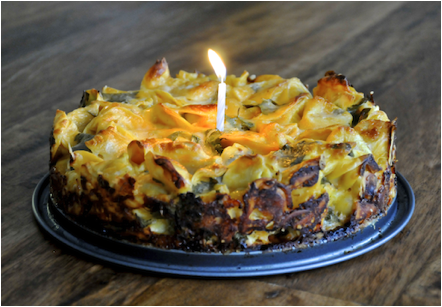
Mr. Giovanni’s Birthday Tortellini Cake Recipe

Did you know that October is National Pasta Month? I didn't know that until now and frankly, I love pasta...it is one of my favorite "food" groups! Today's recipe is courtesy of Giovanni Rana.

To celebrate National Pasta Month (October), Columbus Day (Oct 13), National Pasta Day (Oct 17), World Pasta Day (Oct 25) and Mr. Giovanni’s Birthday (Oct 15), Giovanni Rana will spread #PastaLove with an autumn-inspired Fall In Love With Pasta campaign. Each week, fans who share photos of their favorite pasta will be entered to win a week’s worth of Giovanni Rana pasta and sauce delivered to their door. (Check out @GiovanniRanaUSA on Twitter, Instagram and Facebook.)

Giovanni Rana has been a renowned pasta maker in Italy for over 50 years. In 2012, the Rana family launched its first state-of-the-art factory in the US (just outside of Chicago in Bartlett, IL), which produces the retail line of pasta and sauces now distributed all over the country. The factory is home to proprietary machinery designed by Giovanni that mimics the movements used to hand-roll dough to produce an exceptionally thin pasta with a delicate bite. The fillings are created from artisanal ingredients including DOP Parmigiano Reggiano cheese imported by the wheel and DOP Genovese basil. The retail line features 15 different pastas and 4 sauces, and it introduced to the US new packaging sizes (12 or 22 oz) presented in craft-paper, stand-up pouches for the pasta and smartly-designed sauce containers. The line of filled pastas just introduced two new flavors this fall, Butternut Squash Ravioli and Italian Sausage Mezzaluna.

Mr. Giovanni’s Birthday Tortellini ‘Cake' Recipe

1 22 oz. package Giovanni Rana Cheese ‘Delicato’ Tortellini
1/2 cup Giovanni Rana Marinara Sauce
1/2 cup grated parmigiano reggiano, divided
1/4 cup butter, plus extra for pan
1/4 cup flour
3 cups whole milk
1 1/2 cups (packed) grated fontina cheese, divided
1 egg
1 cup fresh flat-leaf parsley, roughly chopped
1/2 cup ricotta

Butter a springform pan and press 1/4 cup grated parmigiano reggiano onto bottom and sides. Preheat oven to 350 degrees. Melt 1/4 cup butter and whisk in flour over medium-low heat. Once combined, gradually whisk in whole milk, and bring to simmer. Whisking frequently, continue to simmer until mixture has thickened enough to coat the back of a spoon, and leave clean lines when wiped away. Remove from heat. Stir in fontina and remaining parmigiano reggiano, reserving 2 tablespoons of each. Whisk in egg, and then stir in marinara until desired pinkness and flavor.

In a large bowl, combine the refrigerated pasta and cheese sauce. Add parsley and mix to incorporate. Add half of the pasta mixture to the springform pan, and spoon on small dollops of ricotta. Top with remaining pasta, and remaining fontina and parmigiano reggiano. Cover with foil and bake for 25 minutes. Remove foil and bake for 10 more minutes or until cheese on top is golden. Let rest for 30 minutes and remove pan sides.