Welcome To The Shakin 'N Bakin Blog!
Welcome to my blog! I love to cook and bake for my family. I hope you enjoy the recipes, foodie reviews, foodie giveaways and cooking tips posted on my blog.
How to Print Recipes: You can print out each individual recipe featured on this blog by clicking the "share" button at the bottom of each post. It will open up to show you options, click on print and another window will open up with the recipe inside it for printing. You can also use the SHARE button to email a copy of the recipe to yourself for printing later.
Wednesday, November 15, 2017
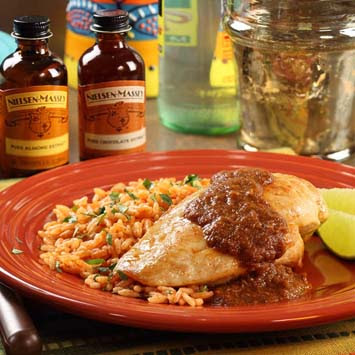
Fiesta Mole Sauce Recipe
This is a guest-post recipe that's courtesy of Nielsen-Massey. The recipe will make 4 servings.
Fiesta Mole Sauce Recipe
1 tablespoon vegetable oil
1 poblano chile, chopped
2 cloves garlic, chopped
1 small onion, chopped
1 tablespoon chili powder
1 cup chicken stock
1 teaspoon Nielsen-Massey Pure Chocolate Extract
1 teaspoon Nielsen-Massey Pure Almond Extract
1 teaspoon salt
1/2 teaspoon cinnamon
scant 1/4 teaspoon cloves
2 tablespoons raisins
1 cup crushed tomatoes
Heat the oil in a medium-sized frying pan and add the chile, garlic and onion. Saute until the mixture is fragrant and the onion is translucent. Cool slightly and add to a blender. Blend until smooth. Return the mixture to the pan and add the remaining ingredients and cook, stirring occasionally 30 minutes.
Use the mixture to top grilled baked or shredded chicken or turkey.
Thursday, March 10, 2016
Mission Fig Conserve Recipe
When people think of "figs" they usually think of it as a filling in a delicious cookie. However, figs can be used hundreds of different ways, including as a delicious condiment like shown below. This condiment is perfect for cheese and paté. The recipe is courtesy of: Paulding and Company and will yield approximately 1 quart.
2 lbs. Mission figs, stemmed and coarsely diced
3/4 cup honey
1/2 cup Port (I used a local Merlot Port from Trentadue Winery)
¼ tsp. salt, or more to taste
1 small Meyer lemon, seeded and finely diced (skin and flesh), or the zest and juice from a regular lemon
dash of ground cinnamon — not more than 1/8 tsp., or it will overwhelm the flavors
Dash of Sriracha sauce or your favorite hot sauce
Combine figs with remaining ingredients except hot sauce in a 2-quart pot. Bring to a simmer, and cook until thick, about 15-20 minutes, on medium heat. Stir frequently to be sure the mixture doesn’t stick. The finished product will be thickly syrupy. Test a bit by letting it cool on a spoon. It shouldn't be runny.
Taste the mixture, and if it needs a bit more lemon juice or salt, add it in, then add the dash of Sriracha sauce at the end. I use my homemade, which is very hot from my home-grown peppers, but commercial should be fine too. This is a perfect condiment to can and give as a gift. I made four small one-cup jars, which I processed in a water bath for 20 minutes, and still had a bit more to nibble on. If you don’t can the conserve, store it in the refrigerator. It should keep for about a month; there’s not as much sugar in it as a jam, so it won’t last forever.
Thursday, December 17, 2015
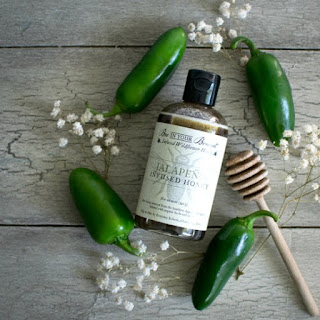
Bee In Your Bonnet Organic Infused Honey
Recently my family was introduced to a line of infused honey called Bee in Your Bonnet by Everyday Eclectic. Here's some additional information about the product and the company.
"When crafting our handmade bottles of golden goodness, we at Everyday Eclectic maintain the same philosophy as with all of our other handcrafted goods: Keep it as pure and simple as possible. We like to let nature speak for itself, and use the beautiful, mouth-watering flavors it has to create a delicate balance of sweet and savory that is sure to delight even the most discerning palate."
"Bee in Your Bonnet Infused Wildflower Honey is comprised of nothing less than the highest-quality pure raw wildflower honey - sourced from independent beekeepers in our own Southern Appalachian region, and infused with the rich, lovely flavors of a select variety of 100% organic herbs and spices."
* Vanilla Bean Infused Honey
* Cinnamon Infused Honey
* Lemon Drop Infused Honey
When it comes to using honey...try to think beyond the coffee and teacup! Honey is a great natural product that can help to flavor and sweeten just about anything!
You can learn more about Bee in Your Bonnet Organic Infused Honey by visiting Everyday Eclectic online. They have other products too!
Disclosure: Shelly received complimentary products for this foodie blog feature. No monetary compensation was received. Regardless of receiving complimentary products, Shelly is expressing her 100% unbiased opinion about the products. Your opinion & thoughts may differ.
Friday, September 25, 2015
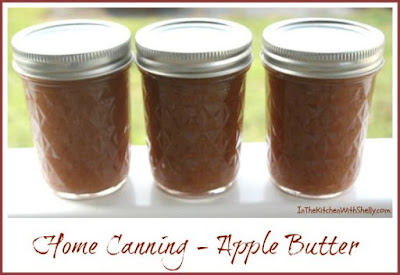
Home Canning - Apple Butter Recipe
This apple butter recipe is for home canning and will make 6 half-pint or 3 pint jars.
Home Canning - Apple Butter Recipe
4 pounds of apples (12-18 apples)
2 cups of water
4 cups granulated sugar
2 tsp. ground cinnamon
1/4 tsp. cloves
Prep: Wash apples under cold running water, drain. Core and peel apples. Cut apples into quarters. (I use an apple peeler & corer that I got from Pampered Chef and it's fabulous! I had 18 apples done within 7 minutes).
Cook: Combine the apples and water together in a large saucepan (I use a medium-sized stock pot). Cook apples at a simmer until soft. Puree mixture using an electric food processor or food mill (I use my Ninja Blender). Measure 2 quarts of apple pulp; return apple pulp to the pan. Stir in the granulated sugar and spices, stirring until sugar dissolves (over medium heat). Cook at a gentle boil until the apple mixture is thick enough to mound on a spoon, stirring frequently. Remove from heat.
Fill: Ladle hot apple butter into a hot jar, leaving a 1/4" headspace and remove air bubbles. Wipe the rim of the jar clean and then add the seal and band, adjusting the band until it's finger-tip tight. Place jar on the rack elevated over simmering water in your water bath canner. Repeat until all jars are filled.
Process: Lower the rack into the simmering water. The water needs to cover the jars completely by at least 1". Adjust the heat to medium-high, cover the canner and bring water to a rolling boil. Process half-pint or pint jars for 10 minutes. Turn off heat and let the jars sit in the hot water for an additional 5 minutes. Remove jars from canner and sit them on a towel on your counter-top to cool. After 12 hours, check seals to make sure jars sealed properly.
Monday, September 21, 2015
Home Canning - Blueberry Jam Recipe
Recently I got a great deal on some large & juicy blueberries at our local fruit orchard and couldn't resist buying them. Yup, if it's a great deal...I have a hard time walking away. Anyway, I bought 5 lbs. of organic, fresh blueberries and decided to make some homemade blueberry jam.
The recipe that I used is from the Ball Blue Book - Guide to Preserving. This recipe uses no pectin. The recipe will make 6 half-pint or 3 pint jars of jam. Here's the recipe.
4-5 lbs. blueberries (9 cups crushed berries)
6 cups granulated sugar
Prep: Wash berries under cold running water and then drain. I like to let mine sit in the colander for about 5 minutes to make sure all of the water drains away. Coarsely crush blueberries one layer at a time using a potato masher. You will need 9 cups of crushed berries to make this recipe.
Cook: Combine the crushed berries and granulated sugar in a large saucepan (I use a medium-sized stock pot). Bring the mixture to a slow boil, stirring until the sugar dissolves. Increase the heat to medium-high and cook rapidly to gelling point of 220 degrees F, stirring to prevent sticking. Please note, your mixture might "splat" and it will be hot so I always wear oven mitts while stirring it to prevent those "splats" from burning my hands. Remove from heat and skin off any foam that may have formed.
Fill: Ladle hot jam into hot jar, leaving a 1/4" headspace. Remove air bubbles and wipe the jar rim clean. Place the seal and band onto the jar, adjusting until it's fingertip tight. Place jar on the rack elevated over simmering water in your water bath canner. Repeat until all of your jars are filled.
Process: Lower the rack into the simmering water. The water needs to cover the jars by at least 1" in depth. Adjust heat to medium-high, cover the canner and bring the water to a full rolling boil. Process half-pint or pint jars for 15 minutes. Turn off the heat, remove cover and let the jars cool for 5 minutes while sitting down in the water. Remove jars from the canner. Lay a towel out on your counter and place the jars on top. Let them cool for 12 hours. Check to make sure all jars are sealed before putting them into your pantry for storage. Any jars that didn't seal will need to be refrigerated and used right away.
Tuesday, September 15, 2015
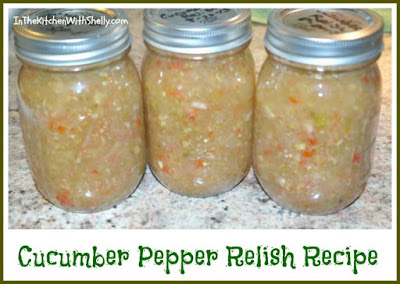
Home Canning - Cucumber Relish Recipe
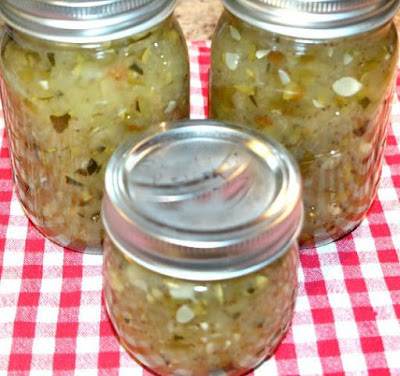
When I make cucumber relish I use the recipe from the Ball Blue Book - Guide to Preserving. Here's the recipe. This recipe will yield about 6 pint jars...although most of the time I get 7 pint jars out of it.
Home Canning - Cucumber Relish Recipe
8 medium cucumbers, chopped
2 cups green bell peppers, chopped
2 cups red bell peppers, chopped
1 cup onion, finely chopped
1 tbsp. turmeric
1/2 cup Ball Salt for Pickling and Preserving
4 quarts water, divided
1 1/2 cups brown sugar
1 quart vinegar, 5% acidity
2 cinnamon sticks
1 tbsp. mustard seed
2 tsp. whole allspice
2 tsp. whole cloves
Note: instead of using mustard seed...I use 1 tbsp. dry mustard.
Prep: Wash cucumbers and green & red bell peppers under cold running water, drain. Cut ends off of each cucumber and coarsely chop into pieces (with skin's on and removing seeds as you go along). Cut off stems from peppers and remove seeds and membranes. Chop peppers into small pieces. Cut onion into finely chopped pieces. Combine all of the chopped cucumbers, bell peppers and onions in a large mixing bowl. Sprinkle the turmeric over the veggies. Combine 2 cups of cold water and salt together, stirring until the salt dissolves. Pour salted water into the bowl and stir. Cover the bowl and place into the refrigerator for 4 hours. Remove from refrigerator and drain away the liquid. Pour 2 quarts of water over vegetables, re-cover the bowl and let stand 1 hour in the refrigerator; drain. Tie whole spices in a spice bag.
Cook: Combine spice bag, sugar and vinegar in a large saucepan. Bring to a boil, stirring until sugar dissolves. Ladle hot pickling liquid over the vegetables. Cover and let stand in the refrigerator for 12 to 18 hours (I usually just do overnight). Remove from refrigerator and place in a large saucepan or stockpot. Bring mixture to a full boil and then reduce the heat to a simmer and simmer until the mixture is hot throughout.
Fill: Pack hot relish into a hot jar, leaving a 1/2" headspace. Remove air bubbles and wipe the jar rim clean. Place hot seal onto a hot jar. Add the band and adjust until it's finger-tip tight. Place jar on the rack above simmering water in your water bath canner. Repeat until all jars are filled.
Process: Lower the rack into simmering water. Water must cover jars by 1 inch. Adjust heat to medium-high. Cover your canner and bring the water to a full boil. Process pint jars for 10 minutes. Turn off the heat and remove the cover. Let the jars sit in the hot water for an additional 5 minutes. Remove jars and let them cool on the counter for 12 hours. Double check seals after they have cooled to make sure they sealed properly.
Print Recipe: You can print out this recipe by clicking on the SHARE button located at the bottom of this post. A new window will open. Click on PRINT and the recipe will load into the window for fast printing. Enjoy!
Saturday, September 12, 2015
Home Canning - Sweet Pickle Relish Recipe
When I make and can my homemade relish I like to use the Ball Canning recipe from the Ball Blue Book - Guide to Preserving. You will find it in the pickled foods section. The recipe will make 8 half-pint jars. Recipe is courtesy of Ball.
Sweet Pickle Relish Recipe
4 large cucumbers = 1 quart (chopped)
2 cups chopped onions
1 cup chopped green bell pepper
1 cup chopped red bell pepper
1/4 cup Ball Salt for Pickling & Canning
3 1/2 cups granulated sugar
1 tbsp. celery seed
1 tbsp. mustard seed
2 cups cider vinegar, 5% acidity
Prep: Wash cucumbers, green & red bell peppers under cool running water; drain. Remove stems and ends from the cucumbers. Peel onions & chop. Combine together the chopped cucumbers, onions, green & red bell peppers in a large bowl. Sprinkle the salt over the top. Pour cold water over the vegetables just to cover. Let bowl stand for 2 hours. Drain vegetables, rinse vegetables under cool water and drain again.
Cook: Combine granulated sugar, spices and vinegar in a large saucepan. Bring mixture to a simmer, add vegetables and simmer for 10 minutes.
Fill: Pack hot relish into hot jars, leaving a 1/2" headspace. Remove air bubbles, place lids on top and then the bands. Adjust bands until they are fingertip tight. Place jars on rack above the simmering water in a boiling water bath canner. Repeat until all jars are filled.
Process: Lower the rack into the simmering water so that water covers all of the jars by 1" or more. Adjust heat to medium-high, cover canner and bring the water to a rolling boil. Process half-pint jars 10 minutes. Turn off heat and remove cover. Let jars cool for 5 minutes. Remove jars from canner, do not retighten any of the bands that might of come loose. Cool jars on the counter for 12 hours. Recheck all jars to make sure they sealed properly before storing them in your pantry.
Print Recipe: You can print out this recipe by clicking on the SHARE button located at the bottom of this post. A new window will open. Click on PRINT and the recipe will load into the window for fast printing. Enjoy!
Tuesday, August 25, 2015
Home Canning - Cucumber Sandwich Pickles Recipe
Home Canning - Cucumber Sandwich Pickles Recipe
2 lbs. 3-4" cucumbers, sliced into 1/4" slices
1/2 cup Ball Salt for Pickling & Preserving
3 quarts water, divided
1 quart plus 1 cup white vinegar 5% acidity, divided
1 cup brown sugar
1 cup granulated sugar
1/2 tsp. celery seed
1/2 tsp. mustard seed
1/2 tsp. turmeric
* When I make this recipe I substitute the mustard seed with 1/2 tsp. of Colman's Dry Mustard.
Prep: Wash cucumbers under cold water, drain. Remove stem and 1/16" from blossom ends of cucumber. Slice cucumber in 1/4" slices. Place slices in a large mixing bowl. Combine salt and 2 quarts of water, stirring until salt dissolves. Pour salted water over cucumber slices. Let stand 2 to 3 hours (I let my stand for 3 complete hours) in the refrigerator. Drain cucumber slices and rinse slices under cold water to rinse away the salt; drain again.
Cook: Combine 3 cups vinegar and 3 cups water in a large saucepan. Bring mixture to a boil. Reduce heat to a simmer. Add cucumber slices and simmer for 5 minutes. Drain, discarding the liquid. Combine 2 cups vinegar, 1 cup water, brown sugar, granulated sugar and spices in a large saucepan. Simmer mixture for 10 minutes. Add cucumber slices and bring mixture to a full boil.
Fill: Ladle hot pickles and pickling liquid into a hot jar, leaving 1/2" headspace. Remove air bubbles. Clean jar rim and place band onto jar until it's finger-tip tight. Place jar on the rack elevated over simmering water in a boiling water bath canner. Repeat until all of your jars are filled.
Process: Lower the rack into simmering water. Water must cover the jars by at least 1". Adjust heat to medium-high, cover the canner and bring the water to a full boil. Once it's boiling you want to process your pint jars for 10 minutes. Turn off the heat and let the jars sit in the hot water for an additional 5 minutes. Remove jars and let them cool on the counter. Make sure you check all of your seals after they have completely cooled to make sure they sealed properly.
Print Recipe: You can print out this recipe by clicking on the SHARE button located at the bottom of this post. A new window will open. Click on PRINT and the recipe will load into the window for fast printing. Enjoy!
Tuesday, August 11, 2015
Home Canning - Red Raspberry Jam Recipe
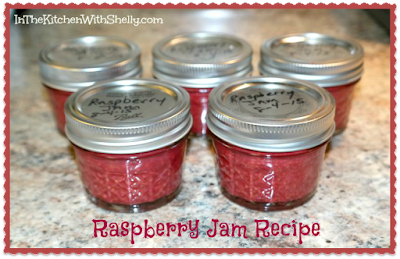
I picked 7 large containers of fresh berries over a 12 day period of time and froze them until I was ready to make my jam. The recipe that I like to use for making and canning red raspberry jam is from the Ball Blue Book - Guide to Preserving on page 53. Here's the recipe.
Home Canning - Raspberry Jam Recipe
* Recipe makes about 6 half-pint jars
2 1/2 quarts red raspberries
1 cup water
1/4 to 1/2 cup granulated sugar
3 tbsp. Ball Low or No Sugar Needed Pectin
Prep: Wash red raspberries under cold water; drain. Gently crush berries one layer at a time using a potato masher until you have 5 cups of crushed raspberries.
Cook: Combine crushed red raspberries, water, granulated sugar and pectin in a large saucepan, stirring to blend everything together. Bring mixture to a full boil over medium-high heat, stirring constantly; boil hard for 1 minute. Remove mixture from heat and if gel begins to form before 1-minute boil is completed, skin off foam if necessary.
Fill: Ladle hot jam into a hot jar, leaving 1/4" headspace. Remove air bubbles, clean jar rim and adjust band to finger-tip tight. Place jar on rack of the water bath canner over simmering hot water. Continue until all jars are filled.
Process: Lower the rack into the simmering water. The water must cover jars by at least 1" over the top. Adjust heat to medium-high, cover canner and bring water to a rolling boil. Process half-pint jars for 10 minutes. Turn off heat and remove cover. Let jars sit in the hot water for 5 minutes. Remove jars from the canner. Cool jars for 12 hours.
Print Recipe: You can print out this recipe by clicking on the SHARE button located at the bottom of this post. A new window will open. Click on PRINT and the recipe will load into the window for fast printing. Enjoy!
Wednesday, August 5, 2015
Home Canning - Zucchini Relish Recipe
Zucchini has been very plentiful this year. Matter of fact, We only planted 4 zucchini plants this year and every week I am getting 2-3 huge fresh ones from my garden. Sometimes I shred them up and use them to make muffins or bread. At other times...I like to make zucchini pickles or relish.
1 3/4 cups granulated sugar
Sunday, August 2, 2015
Canning Homemade Zucchini Pickles Recipe
For the past few weeks I've been using up a ton of zucchini and canning some homemade zucchini pickles and homemade zucchini relish (recipe for the relish is forthcoming). Below you will find the recipe for the zucchini pickles. Recipe will yield 6 to 7 pints of pickles.
Zucchini Pickles Recipe for Home Canning
1 quart distilled white vinegar
2 cups granulated sugar
1/2 teaspoon kosher salt
2 teaspoons celery seed
2 teaspoons ground turmeric
1 teaspoon dry mustard
5-6 fresh zucchini, unpeeled, cut into 1/4" thick spears
1-2 large onions, finely chopped
Combine together the first 6 ingredients listed in the recipe in a large stock pot. Bring mixture to a full boil. Place the zucchini spears and chopped onions in a large bowl. Pour the hot mixture over the top and let it stand for 2 hours, stirring occasionally.
In a large stock pot, bring mixture to a full boil, then simmer the mixture for 5 minutes over medium heat. Continue simmering the mixture over the heat while quickly packing 1 jar at a time with the pickles. Fill each jar to within 1/2" of the top, making sure that vinegar solution (juice) covers the vegetables. Place jars in a water bath canner and process on a low boil for 18-20 minutes. Turn off heat, lift rack to sit on the edge of the water bath canner and let the jars sit there for an additional 5-8 minutes. Remove jars and let them sit on the counter until cool. Once they are room temperature double check all jars to make sure they sealed properly. Store your new pickles in a cool, dry and dark place for up to 1 year.
Thursday, July 9, 2015
Homemade Horseradish Recipe
Tasting the Seasons includes an impressive variety of fast and fresh, irresistible, user-friendly recipes, family-oriented one-dish wonders, updated classics, and creative gourmet entrees. Each and every one of the more than 250 superbly seasoned, beautifully presented and eco-friendly meals was selected to serve as the center of any occasion, from an intimate family dinner to a large holiday celebration. Get ready to have your taste buds rewarded with remarkable style and grace.
* Recipe makes 10 servings.
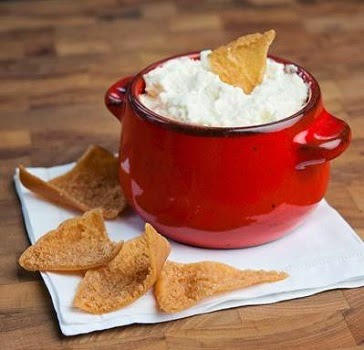
Serve this zesty, simple, crowd-pleasing dip with a variety of raw vegetables — pineapple is a favorite. For a crispy accompaniment, serve with pretzels, crostini or pita chips.
8 ounces light whipped cream cheese
1 cup shredded cheddar cheese
¼ cup sour cream
3 tablespoons prepared horseradish
1 vegetable bouillon cube with sea salt, mashed
In a food processor, combine cream cheese, cheddar cheese, sour cream, horseradish and mashed bouillon cube until well blended, combine making sure that the bouillon cube is fully integrated into mixture. Transfer to a bowl and serve immediately or cover and refrigerate. Serve at room temperature.
Disclosure: This recipe and photo are courtesy of the cookbook featured within this post.
Sunday, May 17, 2015
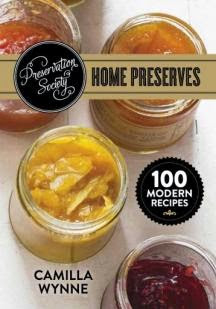
Book Review: Preservation Society Home Preserves + Giveaway
The Preservation Society Home Preserves book contains 192 pages with 60 color photographs. Whether you're a beginner or a seasoned pro, you'll be comfortable making these recipes, which feature reliable, easy-to-follow, up-to-date preserving instructions and information.
Title: The Preservation Society Home Preserves
Author: Camilla Wynne
Publisher: Robert Rose Books
ISBN: 978-0-7788-0503-8
Within the pages of this book you will find delicious recipes like:
* Fig Jam with Secrets
* Bananas Foster
* Pina Colada Jam
* Peach Passion Jam
* Bitters Blood Orange Marmalade
* White Grapefruit Marmalade
* Apricot Butter
* Apple Compote, Rhubarb-Style
* Fruit Cocktail
* Sour Cherry Lemonade Concentrate
* Heartbeets
* Pickled Brussels Sprouts
* Dilly Green Beans
* Miso Mixed Pickle
* Apple Chutney
* Jalapeno Jam
* Plus many more!!!
My grandmother taught me how to home can about 25 years ago and I've been doing it ever since. I am not a professional at it at all and basically can spaghetti sauce, tomatoes, pickles, apple sauce, pear sauce and various jams & jellies. This year though, I am going to expand my horizons!!!
The Preservation Society Home Preserves book is fantastic! It is great for the beginner and the seasoned professional canner. All of the recipes are very easy to understand and I love that the author includes various tips and variations along the way. The foodie photography in this book is mouth-watering and entices you to try your hand at making the recipe.
What I love the most about this book is that it includes all of the recipes that you basically would want to make when it comes to homemade preserves. Jams, jellies, chutney, marmalade and more! All of the things that I love to can! This book is really going to get a work-out once harvesting season comes my way later this summer and I am excited that I have it in my cookbook collection.
Giveaway: One lucky winner is going to win the Preservation Society Home Preserves book from Robert Rose. Value $24.95.
Giveaway Details: This giveaway is open to residents of the USA ONLY who are age 18 and over. Please read the Terms of Service and Disclaimer Policy before entering. This giveaway will close on June 6th, 2015 at midnight EST time.
Disclaimer: Shelly H. has personally reviewed the product listed above. Shelly has not received any monetary compensation for her review. Shelly did receive a free product to try out so she could evaluate and use it for her review. Her thoughts & opinions in this review are unbiased & honest and your opinions may differ. The Shakin N Bakin Blog is not responsible for delivery/shipping of giveaway items won from this blog nor are we responsible for mis-use or injury caused by items won from this Blog. Content on this blog is copyrighted, all rights reserved. We reserve the right to legally pursue anyone who violates our rights and/or steals our copyrighted material.
Posted by
ShellyH
at
5:30 AM
93
comments
![]()
Labels: Canning Recipes, Condiments and Sauces, Product Reviews
Thursday, April 23, 2015
Quick and Easy Banana Muffins Recipe #NMVspring
Today, I am sharing with all of you my thoughts on the Nielsen-Massey Madagascar Bourbon Pure Vanilla Extract which I used to whip up a quick and easy batch of homemade banana muffins. One of the things that I love about this extract is that it's a PURE vanilla extract and not some cheap imitation one that you usually find in your retail stores. Because it's pure, it has a really nice taste and texture to it and often times I can use less of it when I am making various recipes.
Last week I forgot that it was my hubby's turn to bring a bake good into the office to share with his office staff. Every day they all take turns bringing in a homemade treat which is shared with everyone who works there. So, at the last minute I turned to a trusty old cheater recipe to make some muffins.
| Banana Muffins |
1 box of yellow or white cake mix
3/4 teaspoon Nielsen-Massey Pure Vanilla Extract
3 very ripe bananas (peeled & mashed)
ingredients called for on the cake mix box
paper muffin cup liners
Follow the directions on the back of the cake mix box and mix up your cake batter. Stir in the pure vanilla extract and the mashed bananas. Blend everything together until it's mixed well. Fill the paper muffin cups 3/4 of the way full with the batter.
Bake in a preheated 350 degree F oven for 10-12 minutes or until done. Remove and let cool on a wire rack. Store muffins in an airtight container.
Hubby took the banana muffins into work and everyone raved and raved about them. No one could believe they were made from a cheater recipe using a boxed cake mix. I believe that was because I used the Nielsen-Massey Pure Vanilla Extract.
You can learn more about this product and the other products that Nielsen-Massey has to offer by visiting their site. I also encourage you to browse through their recipe section to pick up some great baking and cooking ideas.
Giveaway: One lucky winner is going to win a 2 fl. oz. bottled of Nielsen-Massey Madagascar Bourbon Pure Vanilla Extract.
Giveaway Details: This giveaway is open to residents of the USA ONLY who are age 18 and over. Please read the Terms of Service and Disclaimer Policy before entering. You must be a PUBLIC FOLLOWER of this Blog to have your entries count in my giveaways. (Follow via Google Friend Connect) All non-blog followers will have their entries disqualified after the giveaway closes. This giveaway will close on May 12th, 2015 at midnight EST time.
Disclaimer: Shelly H. has personally reviewed the product listed above. Shelly has not received any monetary compensation for her review. Shelly did receive a free product to try out so she could evaluate and use it for her review. Her thoughts & opinions in this review are unbiased & honest and your opinions may differ. The Shakin N Bakin Blog is not responsible for delivery/shipping of giveaway items won from this blog nor are we responsible for mis-use or injury caused by items won from this Blog. Content on this blog is copyrighted, all rights reserved. We reserve the right to legally pursue anyone who violates our rights and/or steals our copyrighted material.
Monday, March 2, 2015
Mustard Sauce for Corned Beef Recipe
St. Patrick's Day is less than two weeks away and I am already thinking about the great Irish cuisine that we will enjoy on St. Patty's Day. Even though my husband and I are not Irish, we do enjoy some traditional Irish cuisine and we do have fun on St. Patty's Day.
Today I am sharing an easy-to-prepare mustard sauce recipe with all of you from Colman's Mustard. Once you have it prepared you can use it with your traditional corned beef and hash. It's look delicious and I am going to give it a try myself. What do you typically make and enjoy on St. Patrick's Day? Looking for more great recipes? Check out Colman's site online!
5/8 cup water (in which corn beef has been boiled)
5/8 cup vinegar
4 teaspoons Colman’s Dry Mustard Powder
1 egg
4 teaspoons sugar
Mix the egg, mustard and sugar together. Add the vinegar and beef liquid. Heat gently without boiling. Serve hot or cold with hot or cold corned beef.
Sunday, February 1, 2015
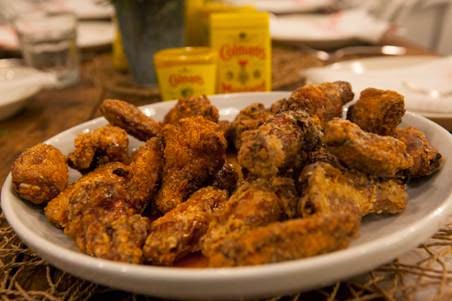
Colman’s Zesty Chicken Wings Recipe
Seahawks, Patriots and Katy Perry … but is your party menu set yet? I think it’s pretty safe to say that chicken wings are always a favorite so I wanted to share two great options to upgrade your wings this year, courtesy of Colman’s Mustard!
Season your fried or baked chicken wings by tossing them in Colman’s Mustard Zesty Dry Rub or Colman’s South Carolina BBQ Sauce
1/3 cup Garlic Powder
1 1/2 tbsp Cumin, ground
2 1/3 cup Brown Sugar
1 tbsp Cayenne
¼ cup Colman’s mustard powder
1/4 cup Cinnamon or canella, ground
2 cup La Colombe Decaf. Espresso, ground
1 1/2 cup Salt, kosher
1/2 cup Black Pepper, ground
Mix all together in a bowl and store in a sealed jar in a cool, dry place.
Colman’s Mustard South Carolina BBQ Sauce Recipe
1/2 cup Colman’s Prepared Mustard
1/2 cup honey
1/4 cup apple cider vinegar
2 tablespoons ketchup
2 tablespoon brown sugar
2 teaspoons Worcestershire sauce
1 teaspoon hot sauce
Mix all together in a bowl, and let sit covered in the refrigerate for at least 24 hours before using to allow the flavors to blend. Keep refrigerated and use within 2 weeks.
About Colman’s Mustard: Established in 1814, Colman’s Mustard of Norwich has been recognized widely as the iconic English mustard in the U.K using a unique and zesty blend of brown mustard and white mustard seeds. Colman’s Mustard provides a pure, fiery and complex condiment for all recipes and dishes. Visit www.colmansusa.com for more information.
Tuesday, December 23, 2014
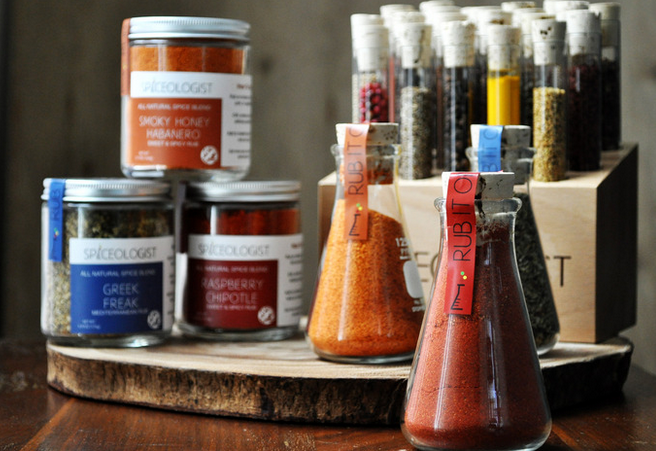
Gourmet Spices and Rubs from Spiceologist
About Spiceologist
Spiceologist was co-founded by Pete Taylor and Heather Scholten in May 2013. Pete, an executive chef by trade, and Heather, the food blogger behind Farmgirl Gourmet are both extremely passionate about spice and flavor, so they decided to create their very own spice company. In order to make some of this possible, they joined kickstarter, where many people were inspired to invest towards Spiceologist’s company. All spice blends are 100% natural (no msg, no artificial ingredients, no preservatives). They are also gluten free, dairy free, soy free and blended with the freshest spices known to man. Each blend has many different uses and takes the guess-work out of “what’s for dinner”. Simply open the jar, sprinkle it on and grill, smoke or bake. Spiceologist has a wide range of spices such as Chiles, baking spices, ground/powders, herbs, salts and whole spices. “If you like cooking “outside the box,” you’ll love our rubs…rim your margarita glass with our Chile Margarita blend, add a pinch of our Raspberry Chipotle blend to brownie batter, make some Cowboy Crust spiced cashews…inspired deliciousness at its best. For a full rub guide (how to use Spiceologist’s rubs and blends, simply visit their kickstarter page.
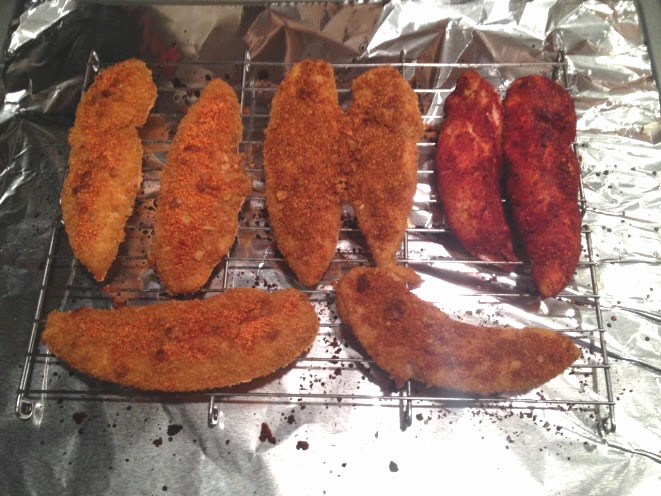
Spiceologist was nice enough to send me four different spice blends and rubs to try: Chile Margarita, Tandoori Glory, Smokey Honey Habanero and Purple Haze. Each spice and blend jar costs about $11, and they are definitely worth the price. When Derek and I first opened up the spices, we knew they were fresh based off of their smell. The Chile Margarita smells like someone just cut open a fresh lime. My boyfriend loves to cook and decided to make chicken tenderloins. He used Purple Haze, Smokey Honey Habanero and Chile Margarita. Now one thing you should know about me is that I am a condiment queen, however the spices and rubs we used were flavorful enough, that I didn’t need to use condiments. For people who like spicy foods, Smokey Honey Habanero has a sweet flavor with the right amount of kick. I cannot wait to try all of Spiceologist’s blends and rubs!
Disclosure: Sara Miller was provided samples of the products being reviewed in this post. No monetary compensation was received. Sara's opinion, thoughts and ideas are 100% unbiased and her own.
Thursday, November 13, 2014
Raspberry Green Tomato Freezer Jam Recipe
Now that our gardening season is coming to an end...I have been really busy making up fresh batches of raspberry green tomato freezer jam for my family. I typically get 7 to 10 half-cup servings every time I make a batch. It will depend on the size of your tomatoes of course! Here is grandma's recipe.
Raspberry Green Tomato Freezer Jam Recipe
5 to 6 cups chopped green tomatoes
boiling water
3 cups granulated sugar
2 boxes red raspberry gelatin mix
Wash and chop up your fresh green tomatoes. I normally use 7 to 10 large green tomatoes which gets me 5 to 6 cups of chopped green tomatoes. Toss them into a pan with hot water, just enough water to cover them. Bring to a boil, stir in the granulated sugar and reduce heat. Simmer mixture on low for 15 to 20 minutes. It is done when everything is soft and squishy. Use a potato masher to mash up the pulp as it cooks...unless you like it chunky. Also, I fish out any tomato skins that float to the top as it cooks down.
Stir in the raspberry gelatin mix until all ingredients are well combined. Simmer over low heat for an additional five minutes. Turn off heat and let mixture sit in the pan for 5 to 8 minutes and then spoon it into freezer-safe containers. Label and freeze. They will keep for up to 1 year.
Posted by
ShellyH
at
6:00 AM
1 comments
![]()
Labels: Canning Recipes, Condiments and Sauces, Freezer Meals and Food
Thursday, November 6, 2014
Orange and Green Tomato Freezer Jam Recipe
Since I don't like to waste food...I decided to make up several batches of green tomato freezer jam with a fruity taste. This particular recipe is my grandmother's Orange & Green Tomato Jam Recipe and it's delicious! You do NOT taste the tomatoes at all and its really easy to make!
This jam will harden up nicely once you freeze it and let the gelatin set. It is great on toasted bagels, rolls or use it as a fish or chicken marinade throughout the winter season. Once it has been cooked, you can let it cool and freeze it in freezer containers or can it via the water bath method with your home canner.
5 to 6 cups chopped green tomatoes
boiling water
3 cups granulated sugar
2 boxes orange gelatin mix
Wash and chop up your fresh green tomatoes. I normally use 7 to 10 large green tomatoes which gets me 5 to 6 cups of chopped green tomatoes. Toss them into a pan with hot water, just enough water to cover them. Bring to a boil, stir in the granulated sugar and reduce heat. Simmer mixture on low for 15 to 20 minutes. It is done when everything is soft and squishy. Use a potato masher to mash up the pulp as it cooks...unless you like it chunky. Also, I fish out any tomato skins that float to the top as it cooks down.
Stir in the orange gelatin mix until all ingredients are well combined. Simmer over low heat for an additional five minutes. Turn off heat and let mixture sit in the pan for 5 to 8 minutes and then spoon it into freezer-safe containers. Label and freeze. They will keep for up to 1 year.
Note: You can print out this recipe by following the "print" instructions listed at the top of my blog.
Posted by
ShellyH
at
6:30 AM
1 comments
![]()
Labels: Canning Recipes, Condiments and Sauces, Freezer Meals and Food


