Welcome To The Shakin 'N Bakin Blog!
Welcome to my blog! I love to cook and bake for my family. I hope you enjoy the recipes, foodie reviews, foodie giveaways and cooking tips posted on my blog.
How to Print Recipes: You can print out each individual recipe featured on this blog by clicking the "share" button at the bottom of each post. It will open up to show you options, click on print and another window will open up with the recipe inside it for printing. You can also use the SHARE button to email a copy of the recipe to yourself for printing later.
Monday, February 20, 2017
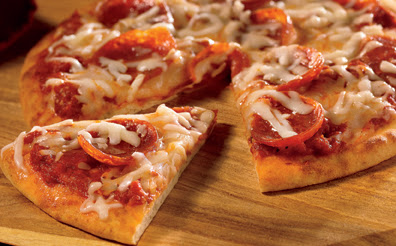
Personal Three-Cheese Pepperoni Pizza Recipe
Personal Three-Cheese Pepperoni Pizza Recipe
1 pkg. (14 oz.) Kontos® Plain or Multi-Grain Personal Pizza Parlor Crust (5 crusts)
1 1/4 cups prepared pizza sauce
5 oz. provolone cheese, sliced
5 oz. sliced pepperoni
1 1/4 cups shredded mozzarella cheese (5 oz.)
Shredded Parmigiano-Reggiano cheese
1. Preheat oven to 425°F.
2. Arrange Pizza Crusts on two baking sheets. Spread 1/4 cup pizza sauce on each crust.
Top with provolone, pepperoni and mozzarella. Sprinkle with Parmigiano-Reggiano cheese.
3. Bake 8 to 10 minutes, or until crust is golden brown and cheese is melted.
For a crispier crust, place pizzas directly on the oven rack.
“This Personal Three-Cheese Pepperoni Pizza is a fresh take on the standard classic,” said Steve Kontos, vice president and owner of Kontos Foods. “More people consume pizza on Halloween than practically any other day, and we wanted to come up with a fast and tasty alternative that people can make at home, but not spend all day in the kitchen, when they’d rather be having fun with their family.”
Monday, August 29, 2016
Granola Munchkins Recipe - Delicious and Easy-to-Make
Note: My mom has made this recipe in the past and has used almond butter instead of peanut butter and loves it made that way too. So, whatever your favorite nut butter is...you could probably use it to make the recipe.
Granola Munchkins Recipe
3 cups Viki's Granola (any variety)
½ cup of smooth peanut butter
½ cup of mini chocolate chips
Combine all ingredients in a mixing bowl, chill for 30-40 minutes in the fridge, then roll into balls. Store in an airtight container in the fridge.
We love this granola! It's a blend of gluten-free oats, organic honey, almonds, pecans and unsweetened coconut. You can use it in various recipes or just snack on it straight from the bag. You can learn more about Viki's Original Granola by visiting the company's site online.
Disclosure: Shelly H. received 2 complimentary bags of Viki's Original Granola to thank her for featuring the company & product here on her foodie blog. No monetary compensation was received.
Wednesday, August 3, 2016
Chocolate Frozen Bananas with Pistachio Recipe
Tip: Did you know… the oils on the inside of a banana peel will help reduce the itchiness and inflammation of a bug bite or poison ivy! Good to know!
Chocolate Frozen Bananas with Pistachio Chewy Bites
Serves 2-4
Ingredients:
4 pieces Setton Farms Pistachio Chewy Bites
1Ž2 cup non-dairy dark chocolate chips
Dash sea salt
2 large bananas
Peel bananas and cut each banana into 4 even pieces. Place a skewer in each banana and place in freezer to firm up, about 1-2 hours. Unwrap all chewy bites and chop until pretty fine. Set aside.
To melt chocolate, place chips in a heat-proof bowl over a small sauce pan filled with about 1 inch water. Or use double boiler. Melt until smooth and whisk.
Dip frozen bananas in melted chocolate and then roll in chopped Pistachio Chewy Bites. Place back in freezer to firm up about 1Ž2 hour, or until ready to eat.
Pistachio Chewy Bites: With two main ingredients, Pistachio Chewy Bites provide healthy snack lovers the amazing benefits of pistachios and cranberries in a delicious and nutritious bite-size bar. Pistachio Chewy Bites are heart-healthy, 100% all natural, gluten and dairy free, low in sodium, GMO free, vegan and a great on-the-go protein snack. They also have no cholesterol, zero trans-fat and are a good source of dietary fiber. These nutrient-rich snack bars provide a great balance of carbohydrates, protein and fat for sustainable energy. With 7 grams of protein, 3 grams of fiber and healthy fat, the individually wrapped bars are the perfect one stop shop.
Sunday, August 16, 2015
FunBites Award-Winning Food Cutter
You can use it on fruits, sandwiches, quesadillas, brownies, cookies, rolled dough, etc. It's available in three different designs: squares, hearts and triangles which is the one we received for this review. The entire unit is small & compact and consists of two plastic pieces. It doesn't take up much room at all in your drawer or cabinet. It's BPA free, dishwasher safe and made in the U.S.A.
My grand daughter was over visiting a few days ago and we made a batch of chocolate brownies. Once they had completely cooled she got to try out the new FunBites food cutter that I received for this review. I read the instructions to her and showed her how it worked. She then took over and had a lot of fun cutting out triangle-shaped brownies that were bite-sized.
You can learn more about the FunBites Food Cutter by visiting their site online.
Disclosure: Complimentary sample product was received for this review. No monetary compensation was received. Shelly's thoughts, opinions and words are 100% her own and were no influenced by the sponsor. Your opinions may differ.
Wednesday, April 22, 2015
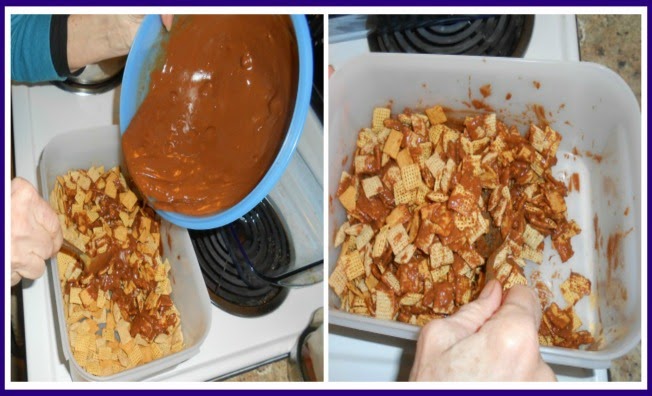
Chex Muddy Buddies Snack Mix Recipe
Note: When I make this recipe I use 3 cups of each of the 3 different flavors of Chex cereal listed below. In addition, I sometimes toss in some miniature marshmallows or M&M's candies too. My sister likes to break up small hard pretzel sticks and toss them into her batch when she makes it so get creative and toss in whatever your kids like.
Chex Muddy Buddies Snack Mix Recipe
9 cups Rice Chex, Corn Chex or Chocolate Chex Cereal
1 cup Semisweet Chocolate Chips
1/2 cup Smooth Peanut Butter
1/4 cup Butter or Margarine
1 teaspoon Vanilla Extract
1 1/2 cups Confectioner's (powdered) Sugar
In a large mixing bowl measure out your 9 cups of Chex cereal. You will need a very large mixing bowl so make sure you plan out appropriately.
Once everything is mixed together store in an airtight bowl, snack canister or in food storage bags.
Saturday, November 8, 2014
Chocolate Cookie Lava Sundaes - Kids Love Them!
One afternoon she helped me bake up a batch of Pillsbury Chocolate Lava Cookies (you can find them in the refrigerated cookie dough aisle at your local store) and once they were done baking, she squeeze all of the chocolate frosting onto them.
We decided to turn those chocolate cookies into fun Chocolate Cookie Lava Sundaes by adding 2 scoops of vanilla bean ice cream into our dessert bowls and placing the warm cookies on top. Oh my gosh...super good and so super easy to make!
When I am in the baking mood, I have been baking chocolate cookies from scratch and using those with some hot fudge sundae sauce warmed up in the microwave. So, if you are pressed for time, buy the Pillsbury Chocolate Lava Cookie Dough and bake those to make them.
These are a big hit with the kids in our family and I have to admit, the adults are loving them too!
Wednesday, August 6, 2014
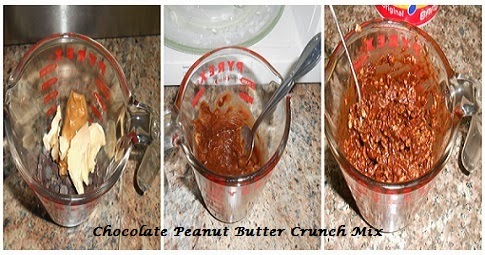
Chocolate Peanut Butter Crunch Mix Recipe
Today I wanted to share a recipe with all of you from page 58 in the book and it only uses 4 basic ingredients that you probably already have in your home. If not, all of them are found in your local grocery store. You can purchase this fabulous cookbook directly from Robert Rose. I highly recommend it!
Chocolate Peanut Butter Crunch Mix
1/4 cup semisweet chocolate chips
1 Tbsp. creamy peanut butter
1 Tbsp. butter
1 cup corn, rice or wheat cereal squares
Note: We used Rice Krispies instead of the author's recommendations.
Line a dinner plate with waxed paper or aluminum foil. You will be using this surface once you have everything prepared.
Immediately stir in the cereal until it has been well-coated. Spread mixture onto your prepared surface (see above). Refrigerate for 20 minutes or until firm. Break into small pieces and store in an airtight container or snack bag.
Note: You can print out this recipe by clicking on the "share" button located at the bottom of this post. Once you click on the button, find the PRINT button and the recipe will load into a new window for printing.
Sunday, March 2, 2014
JOLLY TIME Cocoa Popcorn Crunch Recipe
This recipe has quickly become one of our favorites and the kids just love it! Sometimes we toss in a handful of chopped peanuts, chopped pecans or some mini marshmallows into the popcorn before pouring the chocolate over the top. It is super delicious!
JOLLY TIME Cocoa Popcorn Crunch Recipe
3 cups granulated sugar
1/2 cup unsweetened cocoa powder
1 cup milk
2 tablespoons vanilla extract
6 quarts of popped popcorn
Pop 6 quarts of JOLLY TIME popcorn and set aside. Line your counter top with waxed paper or foil, I use foil personally as I am not a fan of waxed paper. In a medium saucepan combine together the granulated sugar, cocoa powder, milk and the vanilla extract. Boil for 3 minutes or until a candy thermometer reaches 250 degrees. (note: I don't use the candy thermometer but found if I boil for 3 minutes it works out perfectly). You will need to stir the mixture constantly while it is boiling.
Pour the hot cocoa mixture over the popped popcorn that you have sitting in a large bowl. It will be hot so be careful. Use a spoon to stir the mixture together until the popcorn is completely coated. Spread the mixture onto the foil lined counter top or baking sheet. Use a spoon or spatula to flatten it out. Let it cool to firm up. Once cool & firm, break it a part into smaller pieces and place into a container for storage.
Note: You can print out this recipe by clicking on the "share" button located at the bottom of this post. Once you click on the button, find the PRINT button and the recipe will load into a new window for printing.
Saturday, October 26, 2013
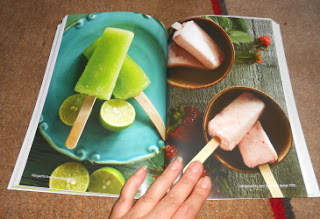
The 200 Best Ice Pop Recipes Cookbook - Review
Title: 200 Best Ice Pop Recipes
Author: Andrew Chase
Publisher: Robert Rose Books
ISBN: 978-0-7788-0441-3
Pages: 248 pages with 24 color photo pages, soft-cover cookbook
Cover Price: US/Canada $24.95
Synopsis: You'll learn everything you need to know about making pops at home, including advice on choosing ingredients, freezing instructions and foolproof unmolding tips. Why buy commercial ice pops when you can be indulging in sumptuous pops made from home. These tantalizing favorites are perfect for everything from cooling off on summer days to capping off a barbecue to providing an afternoon snack for the kids. The frozen treats are made even cooler with innovative flavor combinations inspired by countries around the world, from Asia to Mexico and the Caribbean.
Some of the recipes included in the book:
* Orange Carrot Less-Drip Ice Pops
* Traditional Kulfi Ice Pops
* Banana Ice Pops
* Raspberry Meringue Ice Pops
* Coconut Ice Pops
* Fudge Ice Pops
* Pomegranate Berry Ice Pops
* Margarita Ice Pops
* Strawberry Lassi Ice Pops
* Avocado Ice Pops
* Plus many more!
My Thoughts: I love this cookbook! We have been making our own Ice Pops for many years! I started making my own about 25 years ago as I was fed up with grocery store prices and I didn't like all of the artificial ingredients found in commercial bought Ice Pops. The first recipe we tried from this fabulous book was the Traditional Kulfi Ice Pops which were delicious! You only need 7 ingredients to make them and wow...they taste incredible!
I love that the author has such a large variety of recipes in this cookbook, there is definitely something for everyone and to please all kinds of different taste buds. Some of the recipes are super easy and others take a little more time & ingredients but they are worth it! I also appreciate that every recipe comes with a few tips to help make your preparation and/or serving easier.
Over the next few weeks I am really looking forward to trying out as many of these different ice pop recipes that we can. I think many of them have unique flavor combinations so they are perfect for adults and older kids. Then you have several classic flavors/combinations which are perfect for the younger kids who at times can be picky eaters. I really LOVE this cookbook & happy that I now have it for my cookbook collection.
Head on over to Robert Rose and take a look at all of the great cookbooks that they have to offer.
Disclaimer: Shelly Hill has personally reviewed the product listed above. Shelly has not received any monetary compensation for her review. Shelly did receive a free product to try out so she could evaluate and use it for her review. Her thoughts & opinions in this review are unbiased & honest and your opinions may differ. The Shakin N Bakin Blog is not responsible for delivery/shipping of giveaway items won from this blog nor are we responsible for mis-use or injury caused by items won from this Blog. Content on this blog is copyrighted, all rights reserved. We reserve the right to legally pursue anyone who violates our rights and/or steals our copyrighted material.
Posted by
ShellyH
at
10:01 AM
0
comments
![]()
Labels: Freezer Meals and Food, Product Reviews, Recipes For Kids
Monday, August 19, 2013
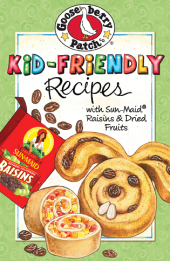
FREE Goose Berry Patch & Sun-maid Raisins Cookbook!
FREE COOKBOOK ALERT! Hurry and grab this one while you can as it's only while supplies last and/or for a limited time!!!
http://www.sunmaid.com/gooseberrykidfriendly/index.html
This handy cookbook features 30 family friendly recipes, along with plenty of tips and easy ideas for getting kids to try new foods. Your family's new favorites are inside!
Cinnabunnies Recipe (from the cookbook)
2 c. biscuit baking mix
1/2 c. Sun-Maid Natural Raisins
1/2 c. sour cream
3 T. milk
2 T. butter, softened
1/2 c. brown sugar, packed
1/4 c. nuts, finely chopped
1/2 t. cinnamon
Garnish: raisins, sliced almonds
In a bowl, stir together baking mix, raisins, sour cream and milk until just combined. Gently gather dough into a ball on a floured tea towel. Knead 10 times. Roll out dough into a 12” x 10” rectangle. Spread dough with butter. Mix together brown sugar, nuts and cinnamon; sprinkle over dough. Starting at a long end, roll up dough tightly. Cut roll into 12 slices. Place 6 slices, cut-side down, on a greased baking sheet about 3 inches apart. Unroll remaining 6 rolls and place on cookie sheet touching one of the rolled cinnamon rolls; fold ends under and shape into bunny ears. Pinch dough to secure. Arrange raisins and almonds to look like eyes, noses and teeth. Bake at 400 degrees for 15 minutes, or until golden. Makes 6.
Sunday, July 14, 2013
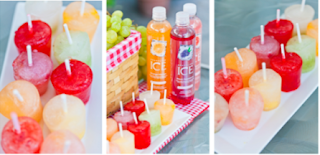
Sparkling ICE Pops - Easy Homemade Popsicles Recipe
We have made the several times and you can make all kinds of flavors by exchanging out the Sparkling ICE and fresh fruit...try some strawberry or watermelon ones if you love fruity flavors!!!
Sparkling ICE Pops Recipe
Ice Cube Tray (or your favorite ice pop making molds)
Toothpicks or popsicle sticks
1 bottle Black Raspberry Sparkling ICE
1 container of fresh raspberries, chopped
Fill you trays or molds with Sparkling ICE, topping each with a scoop of chopped raspberries. If using ice cube trays cover tray tightly with tin foil. Poke a popsicle stick through the foil into each cube. If using an ice pop maker place the handle sticks into the molds. Place in the freezer for about 2 hours or until frozen. Enjoy!
Thursday, December 27, 2012
Homemade Pizza Recipe Made from Refrigerated Biscuits
My family loves homemade pizza but there are times when I don't have the time to make a homemade pizza dough. If you are not good at making your own dough or you don't have the time to spend making a homemade dough, this homemade pizza recipe is for you. The recipe calls for 2 tubes (cans) of refrigerator biscuits which is a huge time-saver on busy weekday nights.
Delicious Homemade Pizza Recipe
1 ½ lb. lean ground beef
1 jar pizza sauce
2 tubes refrigerator biscuits
1 ½ cups shredded mozzarella cheese
1 cup shredded cheddar cheese
Preheat the oven to 400 degrees F. Brown the lean ground beef in a large skillet and drain away the grease once the beef has been fully cooked. Mix together the pizza sauce and lean ground beef over medium heat and simmer for 3 to 5 minutes.
Quarter the refrigerated biscuits and place in a 13-in x 9-in x 2-in greased baking dish. Top the biscuits with the beef and tomato sauce mixture. Place baking dish into a preheated 400 degree oven and bake for 17 minutes. Remove baking dish from oven and sprinkle the shredded cheddar cheese on top. Place baking dish back into the oven and bake for an additional 5 minutes. Remove from oven and serve immediately.
Monday, July 30, 2012
Frozen Raspberry ICE Pops Homemade Popsicles Recipe
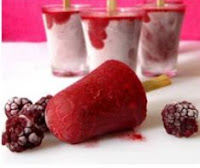 Here is a great recipe that your kids will love and it's from our great friends over at Sparkling ICE. Now that summer is really into full HOT gear it's the perfect cool-me-down snack on a hot afternoon!
Frozen Raspberry ICE Pops Homemade Popsicles Recipe
Ice Cube Tray (or your favorite ice pop making molds)
Toothpicks or popsicle sticks
1 Bottle Black Raspberry Sparkling ICE
1 Container of fresh raspberries, chopped
Preparation: Fill you trays or molds with Sparkling ICE, topping each with a scoop of chopped raspberries. If using ice cube trays cover tray tightly with tin foil. Poke a popsicle stick through the foil into each cube. If using an ice pop maker place the handle sticks into the molds. Place in the freezer for about 2 hours or until frozen. Enjoy!
Tuesday, July 24, 2012
Pomi Pizza Sauce and Marinara Sauce
How many of you love Italian foods? I know I do! Today I am going to talk to all of you about the delicious tomato products by the great folks over at Pomi. These tomato products were introduced to the US marketplace back in 1982 and now millions of Americans use them in their own homes. The Pomi products are all imported from Italy and trust me, those Italians know their tomato products!
The company sent me several Pomi products to review for all of you and today, I am focusing on the Pomi Pizza Sauce and the Pomi Marinara Sauce.
Like most American families, we love Italian foods! Matter of fact, my husband is full Italian and his mother was born in Italy back in the 1930's, married and then moved over here to the states. My husband is pretty picky about the ingredients I use in Italian dishes, so were pretty excited to try out the Pomi products for all of you.
The first thing I want to say about the Pomi products is that I appreciate that they are not packaged in metal cans as I prefer to not use canned products. I love that their tomato products are packaged in easy-to-use cartons!
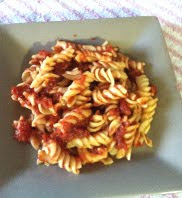 The Pomi Marinara Sauce is all-natural and ready-to-use straight from the carton. We decided to boil up some pasta and while that was cooking I heated up the marinara sauce in another pan with a tablespoon of olive oil added to it. Once everything was done cooking, we drained the pasta and mixed in the marinara sauce. Everything smelled so good but would this pass the taste test with my family? Yes it would! My 50 year old husband, 27 year old daughter, 3 year old granddaughter and myself...gobbled up every last bite!
I have made homemade pasta sauces from scratch many times and this marinara sauce tasted like I had simmered it all day long! It was fresh tasting and very flavorful. My picky Italian husband gave it a big two-spoons up!
The next product we tried was the Pomi Pizza Sauce which is all-natural and packaged in an easy-to-use carton just like the marinara sauce. As soon as you popped open the carton you could smell something delicious inside!
We decided to make some homemade bagel pizzas using the pizza sauce and they were super delicious! We cut our bagels in half and then topped them with some pizza sauce and Mozzarella cheese. We placed them into our toaster oven and toasted/baked them for about 7 minutes at about 300 degrees. Once done my family dug in and chowed down! We love making simple things like this for lunch and these bagel pizzas were super good! The pizza sauce was fresh-tasting and very flavorful. Matter of fact, when I make bagel pizzas for my family again, I will ONLY use the Pomi Pizza Sauce because my entire family raved and raved about how good these pizzas were! Yummy!
So far...we are really loving the Pomi tomato products and next week we will be trying out 2 additional ones and sharing all of the information here on our Shakin N Bakin Foodie Blog with all of you. Stay tuned, part 2 of this review will be coming next week along with a great recipe from the folks over at Pomi!
Disclaimer: Shelly Hill has personally reviewed the product listed above. Shelly has not received any monetary compensation for her review. Shelly did receive a free product to try out so she could evaluate and use it for her review. Her thoughts & opinions in this review are unbiased & honest and your opinions may differ. The Shakin N Bakin Blog is not responsible for delivery/shipping of giveaway items won from this blog nor are we responsible for mis-use or injury caused by items won from this Blog. Content on this blog is copyrighted, all rights reserved. We reserve the right to legally pursue anyone who violates our rights and/or steals our copyrighted material.
Posted by
ShellyH
at
11:00 AM
0
comments
![]()
Labels: Appetizers, Condiments and Sauces, Product Reviews, Recipes For Kids
Friday, June 29, 2012
Peanut Butter and Raspberry Jelly Cookies Recipe
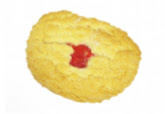 A few weeks ago I needed to bake up a batch of cookies for my grand daughter's preschool class for their monthly bake sale and I decided to use my great auntie's recipe for homemade peanut butter and raspberry jelly cookies. These cookies were such a hit at the bake sale that they asked me to bake another batch for the following week for the preschool class' snack time and I was more than happy to make another batch of cookies for them.
Peanut Butter and Raspberry Jelly Cookies Recipe
1 cup butter, softened
1 cup creamy peanut butter
1 teaspoon vanilla extract
2/3 cup brown sugar
1/3 cup granulated sugar
2 large eggs
2 cups all-purpose white flour
1 cup raspberry preserves (or your favorite flavor)
* I grow and harvest my own raspberries from my backyard so I used my own canned raspberry preserves to make the cookies, but you can certainly use store bought preserves in any flavor that you would like.
Preheat oven to 350 degrees F.
In a large mixing bowl cream together the softened butter, creamy peanut butter and vanilla extract until creamy and smooth. Stir in the brown sugar and granulated sugaar and mix until well combined. Beat in the eggs, one at a time. Gradually add in the all-purpose flour and mix the cookie batter until well combined.
Start forming the dough into 1 3/4" diameter balls and place them onto an ungreased baking sheet. Press your thumb into the middle of each ball to make an indent into the cookie. Spoon a 1/2 teaspoon of the raspberry preserves into the center of each cookie.
Place the baking sheet into the preheated oven and bake for 8-10 minutes or until the cookies are lightly browned. Remove baking sheet from oven and place the cookies on a wire rack to cool. Store them in an airtight container.
Sunday, June 26, 2011
Grilling - Homemade Hawaiian S'Mores and Peanut Butter Jelly S'Mores Recipes
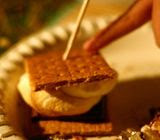 This summer try changing up the ingredients you use to make homemade roasted or grilled S'mores! Sure...you can stick to regular graham crackers, roasted marshmallows and a few bars of chocolate but why just stop there?
Have you ever tried a Pineapple Coconut S'more? It is really easy to make and totally yummy!
Hawaiian Pineapple Coconut S'Mores Recipe
You will need a few squares of chocolate, pineapple tidbits (drained), some coconut flakes, marshmallows and graham crackers. Toast or Roast your marshmallows like you normally do and then place your chocolate square onto the graham cracker, then the roasted marshmallow, sprinkle on some coconut flakes and then 2 small pieces of pineapple and then top it with another graham cracker. That's it!
The kids in our family like homemade Peanut Butter & Jelly S'mores and this is how we make those.
Peanut Butter and Jelly S'mores Recipe
You will need a few graham crackers, some creamy peanut butter, your favorite jelly and some roasted/toasted marshmallows. Spread some creamy peanut butter onto one of your graham crackers along with some jelly. Toast/Roast your marshmallow and place it on top along with a second graham cracker. Let it cool for a minute or two and then let the kids enjoy them!
Friday, April 1, 2011
Easy to Make Easter Treats for Kids ~ Including Recipes!
Easy to Make Easter Treats for Kids by Denise Willms
Easter is such an exciting time if you have small children. They eagerly anticipate the Easter Bunny's visit and all the treats he will bring them. Even my two teenagers look forward to his arrival each spring!
I also like to make my own special treats for my family. Here are three of my favorite Easter treats to make for kids... no matter how old they are. These treats all have two things in common: they're easy to make and they're all made with jello.
Enjoy!
Easter Flowers2 pkgs of jello in your kids' favorite flavor
1 1/4 cups boiling water
4 small paper cups
4 large marshmallows
To create the flower pots, make the jello by dissolving the powder into the bowling water. When it's completely dissolved, pour it into the paper cups. Refrigerate the cuts until the jello is firm, probably about 3 hours.
To make the flowers, cut each marshmallow into five pieces to make flower petals. Put the petals together in a flower shape. You will have to squeeze them together tightly so they stay. For decoration, you can press sprinkles onto the petals and put a candy in the center of the flower.
To assemble your flower, put a toothpick into the center of the marshmallow flower. Then place the toothpick into a straw. Now you have a pretty Easter flower on a stem.
Peel away the paper cups from the jello pots. Place the pot on a serving plate and plant your flower in the center of your pot.
Jiggly Easter Eggs
2 large packages of jello, or 4 small packages
2 1/2 cups boiling water or juice
Mix the jello powder with the boiling water or juice. Pour the mixture into a 13x9 inch pan. Chill until firm, usually around 3 hours.
When the jello is set, dip the pan in warm warm for about 15 seconds. Then use your favorite Easter cookie cutters to cut into shapes. Lift them out of the pan. Make sure you keep your jiggly Easter eggs in the fridge until you're ready to serve them.
Popcorn Bunnies1/4 cup butter
6 cups miniature marshmallows
1 pkg (85 g) jello powder
12 cups popped popcorn
Microwave the butter and marshmallows until marshmallows are puffy. Then add the jelly powder and mix well. The marshmallows will melt while you stire.
Pour the marshmallow mixture over your popcorn. Stir quickly and coat all the popcorn.
To shape your popcorn into bunny shapes, make one popcorn ball for the bunny's body. Then make a smaller one for the head. Finally, finish off the bunny by adding two ears. You can add candy or raisins to make a bunny face.
Denise Willms is a freelance writer and virtual assistant, and a work at home mom to two teenagers.
Saturday, June 19, 2010
Homemade Easy To Make Orange Slushie Beverage Recipe
During the hot summertime months, I love to make homemade slushies and this orange slush recipe is a family favorite!
You will need to assemble the ingredients and use your household blender to make it. You can freeze and then partially thaw any leftovers if you have any.
Homemade Orange Slushie Recipe
1 cup of milk (I use 2% milk)
1 cup of tap water
1/2 of a can of orange juice concentrate, partially thawed
1/2 cup granulated sugar
1 teaspoon vanilla extract
14 ice cubes
I like to partially thaw my orange juice concentrate so I sit it out onto my counter for a few minutes while I assemble the rest of my ingredients. You will want to add all of the above ingredients to your blender container in the order that they are given. Then blend until the ice is all chopped up and serve immediately in chilled glasses.
Sunday, May 2, 2010
Homemade Popcorn Balls Recipe
 When my daughter was little, we used to spend time a few times a year...making some delicous homemade popcorn balls! Making your own from scratch is a lot easier than you might think. Here is how we used to make them.
Popcorn Balls Recipe
1 stick of butter, softened
1 stick of margarine, softened
2 cups of granulated sugar
1/2 cup white corn syrup
1 teaspoon salt
1/2 teaspoon baking soda
1 teaspoon vanilla extract
6 quarts of popped popcorn
Place the stick of butter and margarine in a large saucepan and melt over low heat. Stir in the granulated sugar, corn syrup and salt. Using a non-stick silicone spatula for stirring and stir until the mixture comes to a boil. You will want to boil the mixture for approximately 5 minutes. Stir in the baking soda and vanilla extract.
Remove the saucepan from the heat and pour the mixture over the popcorn. Mix well. Once it has cooled enough to handle, use your hands and shape into balls. Place your balls on a non-stick silicone baking mat or parchament paper to harden. Once they are harden, place in an airtight container.
Friday, January 1, 2010
Easy English Muffin Mini Pizzas Recipe
If you don't have any English Muffins, you can certainly use Bagels too!
Alternative Pizza Toppings: sliced ham, shredded chicken, beef steak pieces, pineapple chunks, anchovies, red and green peppers or broccoli florets.
English Muffin Mini Pizzas
3 English Muffin halves
4-5 ounces pizza sauce
1/2 of minced onion
2 tablespoons of sliced black olives
9 pieces of sliced pepperoni
4 ounce can of mushroom pieces
1/2 cup of shredded Mozzarella cheese
Preheat oven to 350 degrees.
Drain water/juice from black olives and mushroom pieces and set aside. Place English Muffin halves cut side up on a baking sheet lined with a Nonstick Silicone Wonder Baking Mat. Place baking sheet into the oven for 5 minutes. In a small bowl, combine together the pizza sauce and minced onion. Remove English Muffin halves from the oven and spoon the pizza sauce on top. Gently layer the black olives, pepperoni, mushroom pieces and finally the shredded Mozzarella Cheese on top. Place the baking sheet back into the oven and bake for 10-12 additional minutes or until the cheese is melted, hot and bubbly.


